My first guest blogger is Bonnie, a sweet wife, and mother to her beautiful little Elora. I met Bonnie when her husband's childhood friend married my childhood friend last year. We discovered that we both love crafting and blogging, and have been blog buddies ever since. Bonnie is an incredible seamstress, and makes beautiful little outfits for her daughter. She also enjoys making custom orders through her Etsy shop, so if you need a special outfit, a pretty bag, a cute bow tie for your little guy, or a headband for your sweetie pie, be sure to talk with her!
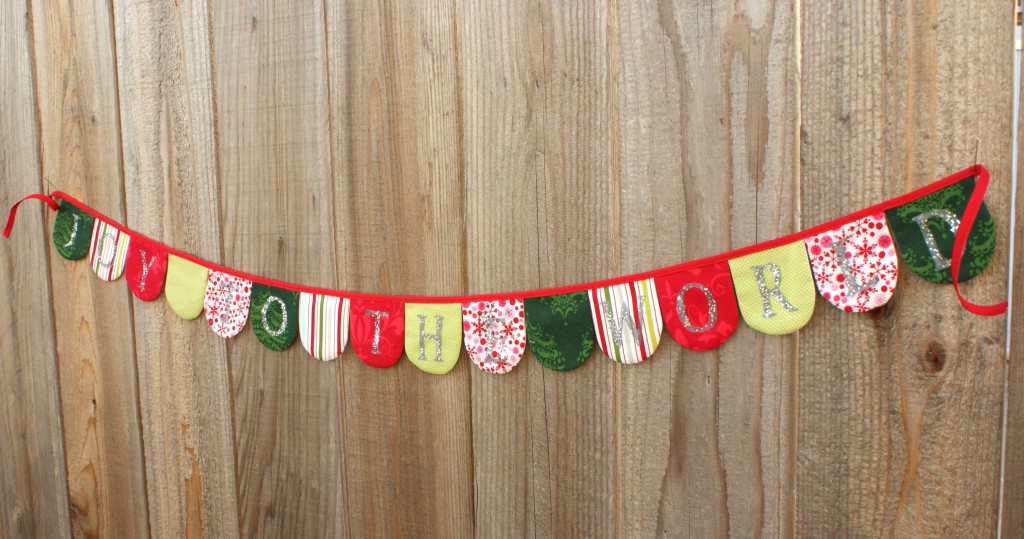
Scalloped Christmas Bunting Banner
Hello, Happy Homemaker Me readers, my name is Bonnie and I am so glad to be here on Bethany's blog today, what a privilege! Normally, you can find me over at The Pretty Bitty Blog, but today I'm posting my very first tutorial here on Happy Homemaker Me.
I am going to show you how to make a fun little Christmas bunting banner.
First, gather up some supplies.
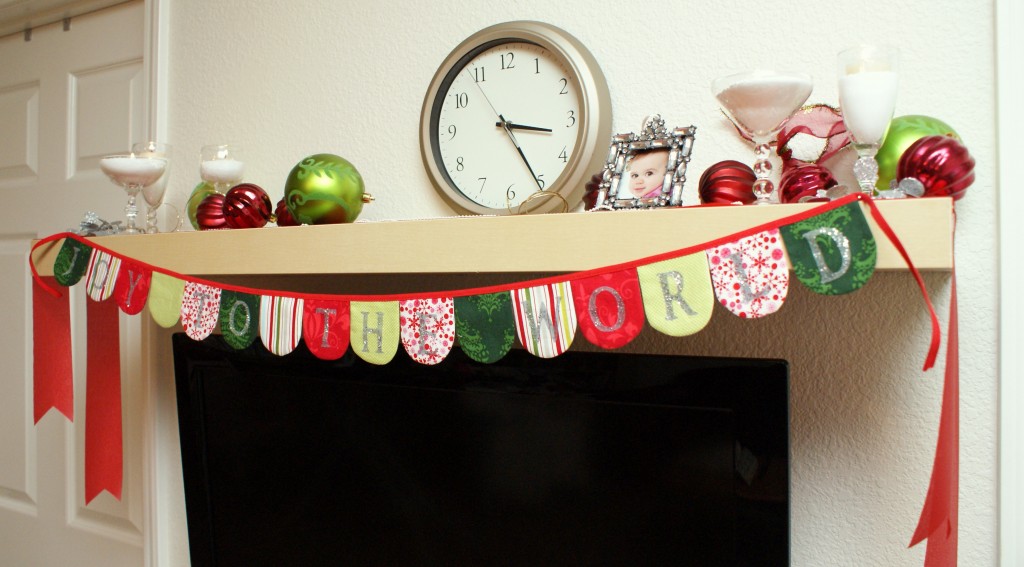
To make a "Joy to the World" banner, here's what you'll need:
16 3"x3" squares of fabric for the front- I used 5 different prints, so I had 4 squares of one print, and 3 squares of all the others
16 3"x3" squares of backing fabric- I used a white cotton
55" of 1/4" double fold bias tape
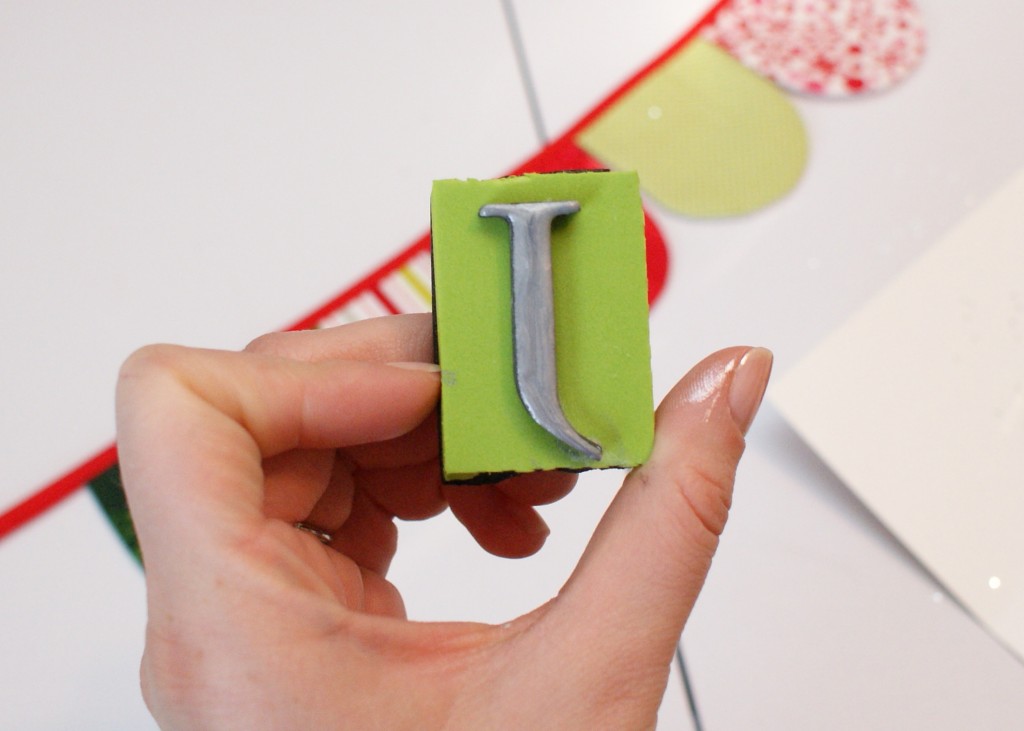
Letter stamps
Acrylic Paint- I chose silver
Glitter- if you want some sparkle
Paint brush
Rotary cutter, mat, and ruler
And the sewing basics: sewing machine, thread, scissors, iron
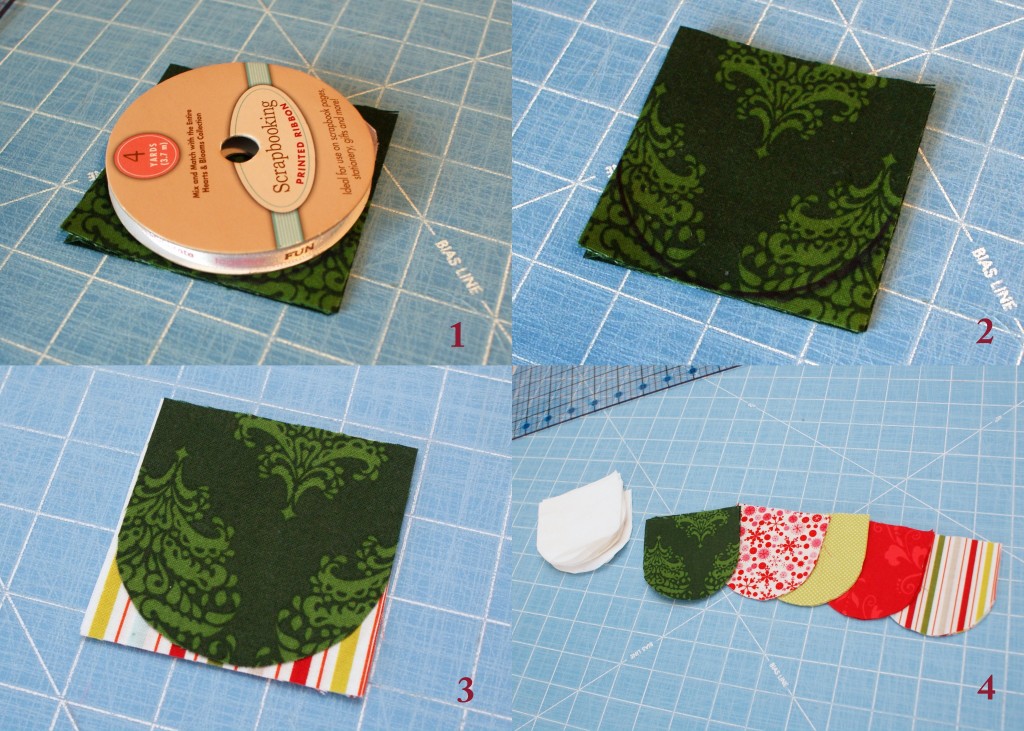
Now let's get started! Once you've cut all of your fabric squares, you need to round the bottom of each piece to give it that cute little scalloped look. If you're really good at eyeing things like this, you can do that, but, I am horrible at it. So I always find something laying around with the shape I need, sometimes it's a cup, sometimes a plate, this time, a spool of ribbon.
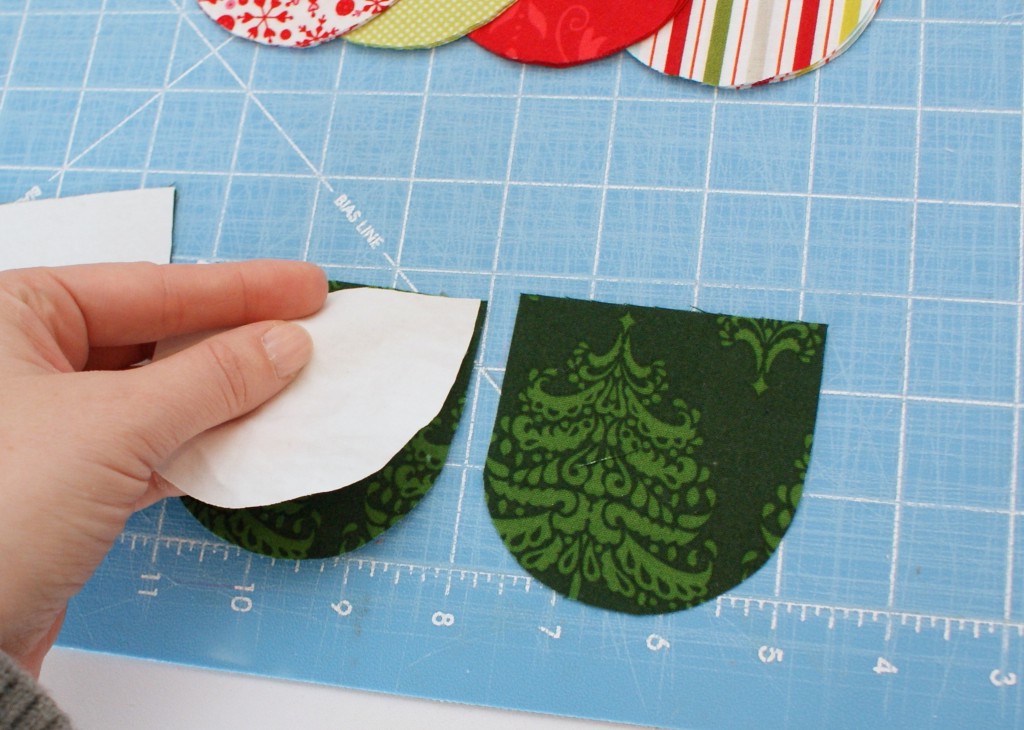
Place the round item of your choosing on one of the squares and trace around it, then cut on the line. Use this piece of fabric for the template to cut the rest of your scallops. I cut through 3-4 at a time to speed things up.
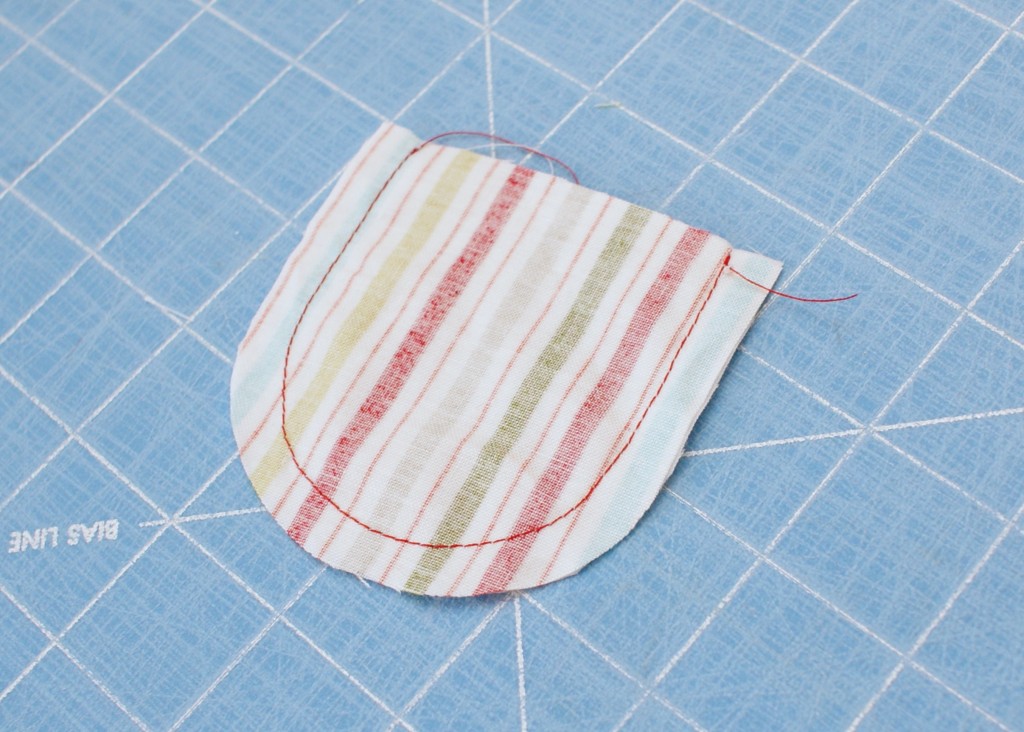
Next, assemble each flag, placing one print fabric and one backing fabric right sides together.
Using 1/4" seam allowance, sew around the edge of each flag leaving the top open for turning.
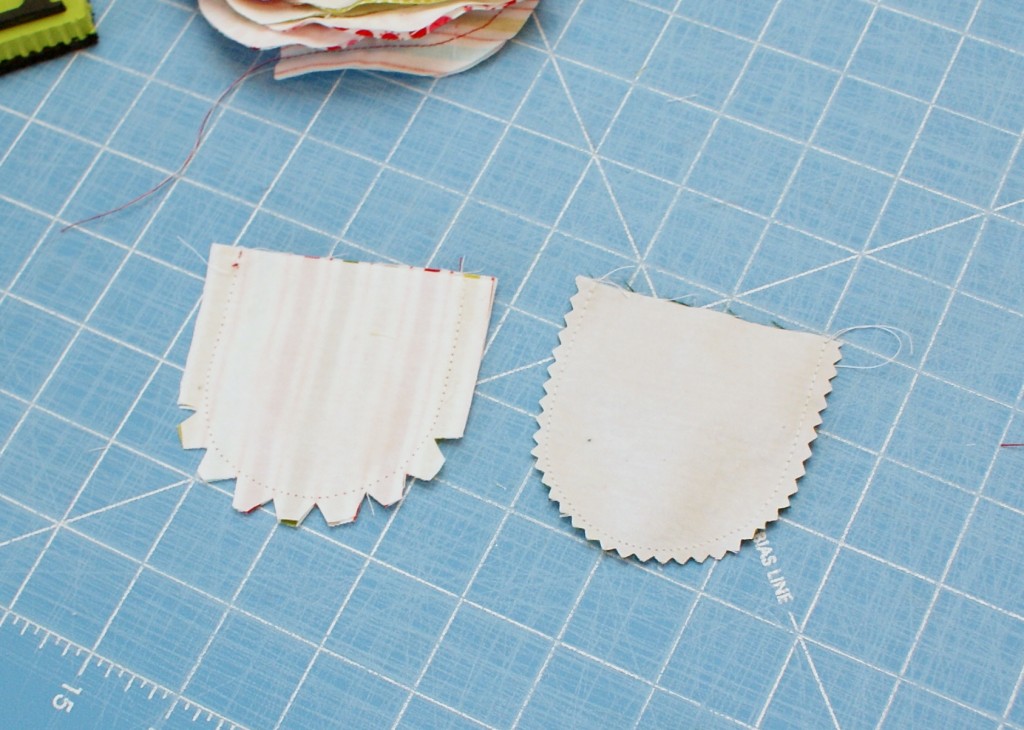
After you've sewn all of the pieces, you'll need to clip the rounded part of each little flag. If you have pinking shears, they work great for this! Just cut all the way around the scallop close to the stitches, being careful not to cut into the stitching. If you don't have pinking shears, you can do this the proper way. Using some sharp scissors, cut little Vs all around the curve on the bottom of the flag. Clipping the curves, whether with pinking shears or the V cuts, removed the excess fabric that would get bunched up in your nice little curve when you turn the flags right side out.
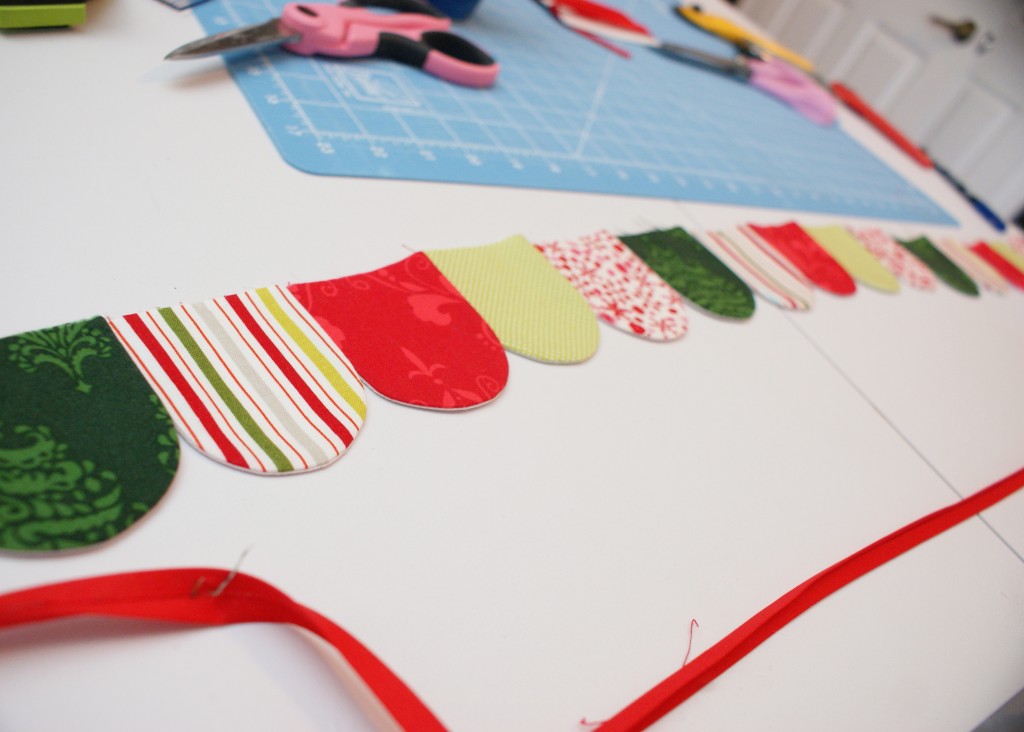
Now we're going to turn each flag right side out and press them. Then lay the flags out in the order you want them in for the banner.
Once you have them all put in order, pick up the first one and stack each proceeding flag beneath it, in order. You want to keep them in the right order so that when you sew them on you don't have to think about what goes where, just take off the top of the pile as you assemble the banner.
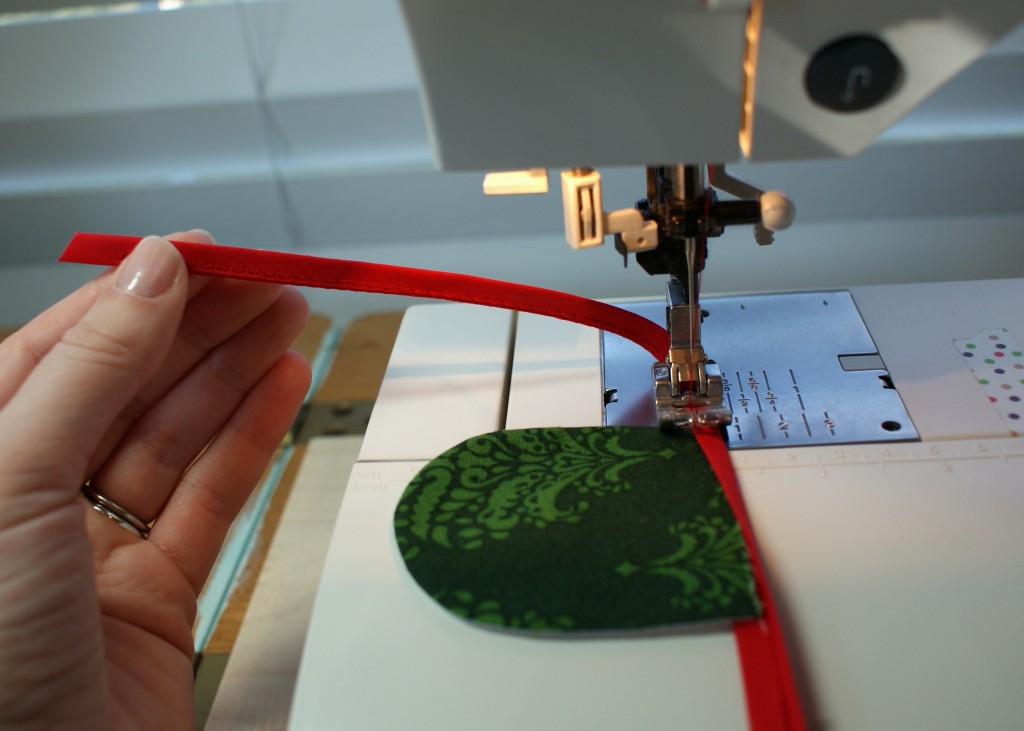
Take your bias tape and, using a small zigzag stitch, sew about 5 inches, then, with your needle still in the fabric, lift the foot of your sewing machine and place the first flag in the fold of the bias tape. Make sure it's nice and snug at the top crease.
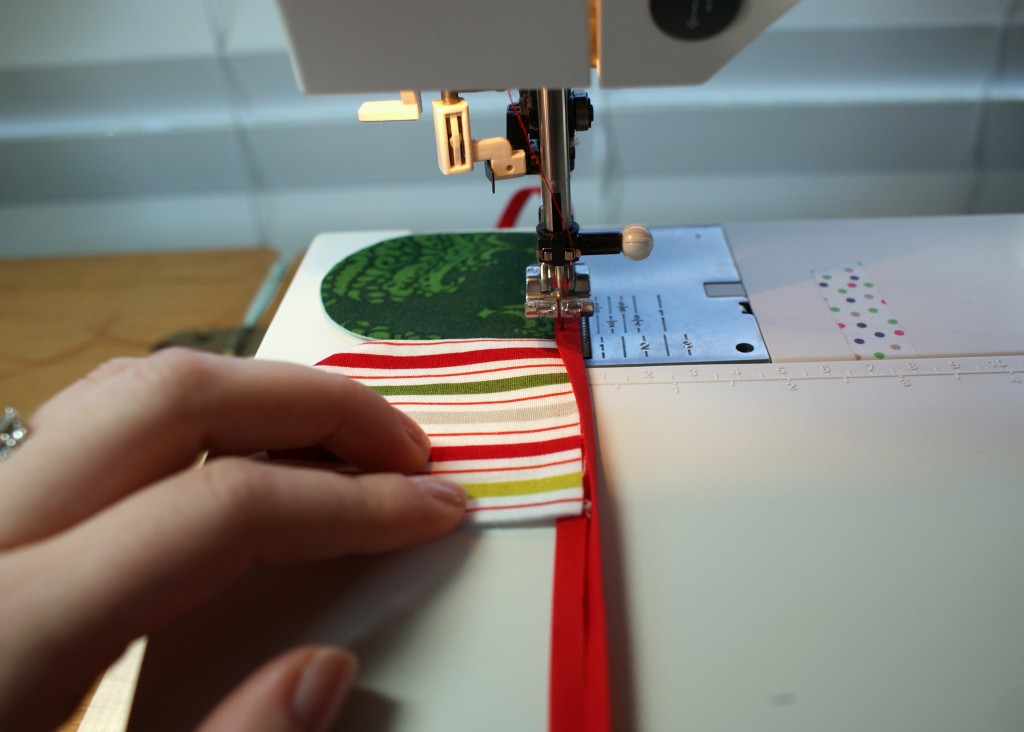
Then, continuing with the zigzag, sew over the flag, just stopping short of the edge. With your needle still in the fabric, lift the foot and place the next flag into the fold of the bias tape. Once again, make sure it's snug at the top crease and also with the flag before it. Continue this process until all of your flags are attached to the bias tape.
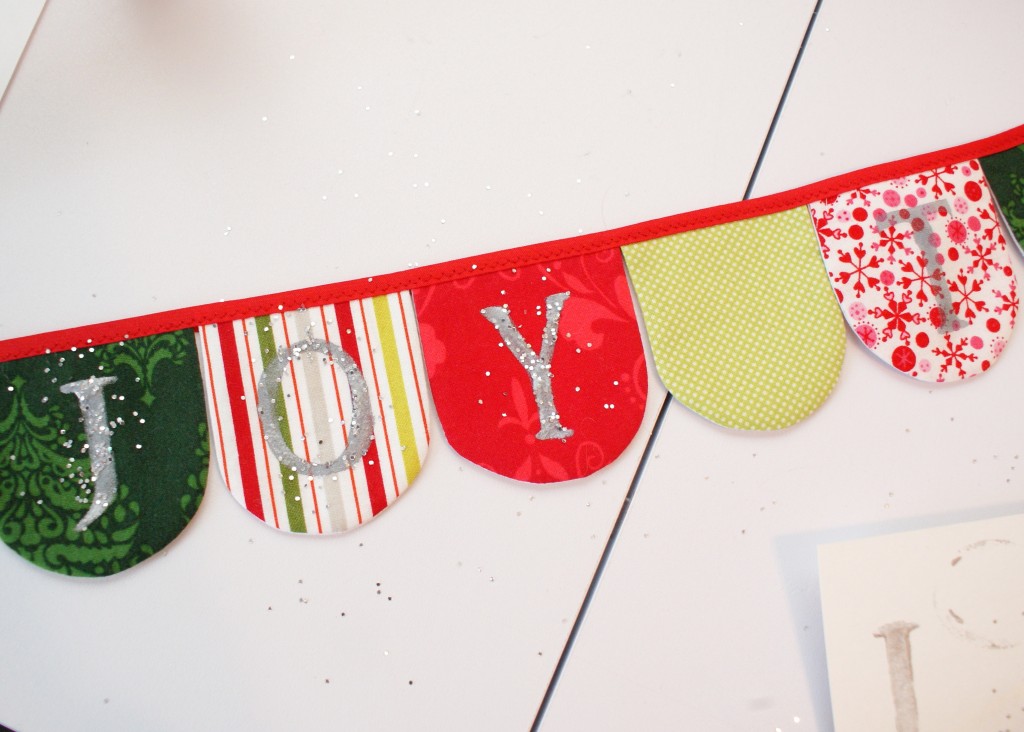
And now, we stamp! I'm using some foam stamps, but you can use rubber stamps too, just make sure you wash it really well right after so you don't run in to problems with paint on your stamps. Using the paint brush, apply a liberal amount of pant to your stamp. The fabric wants to absorb the paint so you need to use a lot (and you might want to put some paper under the banner to protect your work surface while you're working with the paint). Carefully stamp each flag with the appropriate letter. It works well if you hold the flag down with a few fingers from one hand while you stamp the letter with the other.
Once you've stamped the whole banner, the first letters should be dry enough to tell whether you need a paint touch up. Due to the fabric absorbing the paint, you will probably need to do a bit of touch up work. Use a paint brush to fill in where needed. After you touch up a letter, sprinkle a bit of glitter on it. I wanted my letters to be slightly sparkly but not thick with glitter so I just sprinkled a "pinch" over each one.
Now, just wait for your banner to dry and find a lovely place to hang it!
Thank you for allowing me to share this tutorial with you. I hope you enjoyed it. Have a very merry Christmas!
Many thanks to Bethany for hosting this holiday series and allowing me to be a part of it! Thank you!





Such a pretty bunting!
ReplyDeleteI've always struggled with the rounded buntings, but I think I'm going to give it another try after seeing this. Love it! I'm excited to see what everyone else makes!
ReplyDelete