What an incredible year this has been.
A year ago tonight, I was getting ready to brave the crowds at the Rose Parade for the 3rd year in a row. I was 24, working in a Special Ed classroom and loving every minute of it, excited about my new Etsy shop and filling my head with ideas of what I would do to make Happy Homemaker Me a thriving blog in 2011.
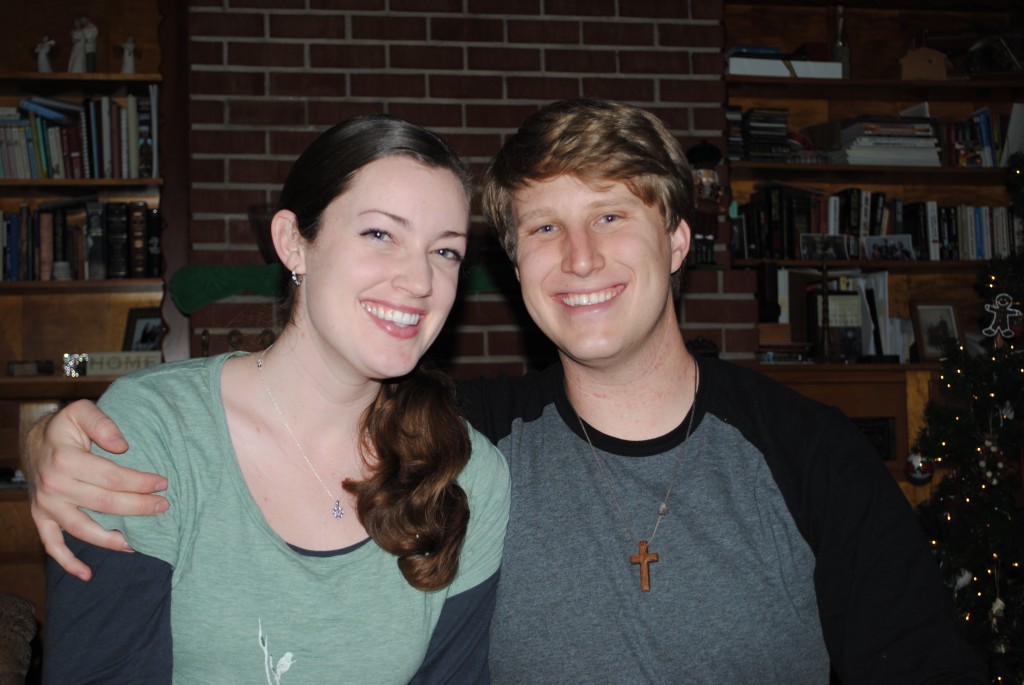
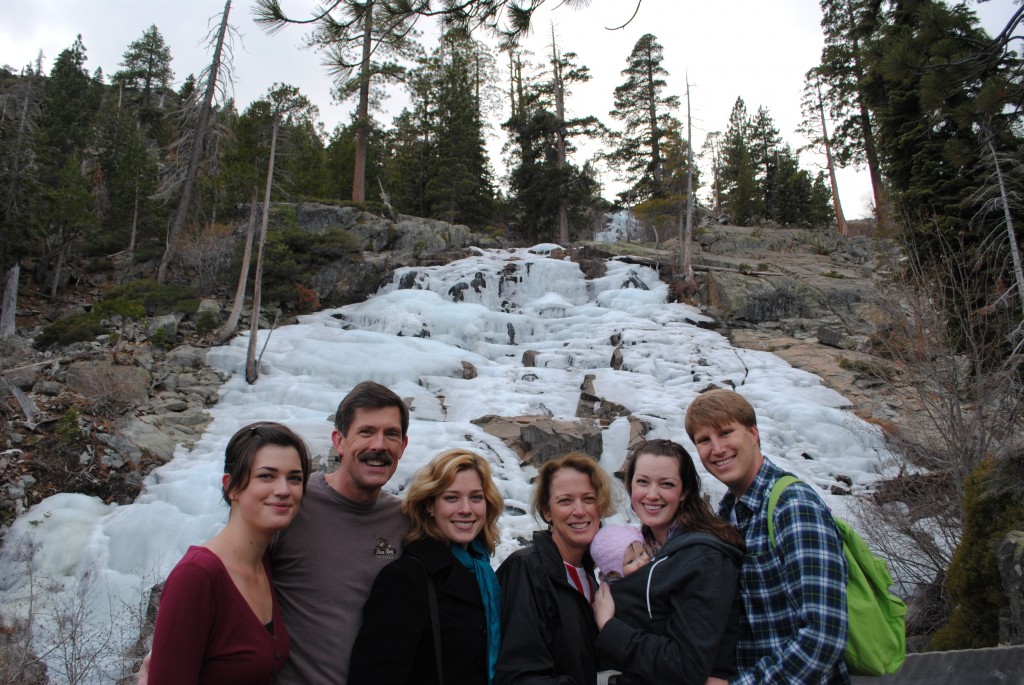
Tonight, I'm up in the Sierra Nevada mountains with my parents, my sisters, my Handsome Man, and the most precious rosy little girl in the world. There is so much to reflect on and be thankful for!
I'm in love with a wonderful man who cherishes me, provides for me, and works hard so that I can stay home with our sweet Kayleigh Grace. Nothing much happened with my Etsy shop (and I'm ashamed with how neglected this blog was for the majority of the year...) but I didn't mind much that the distraction that kept me away from both was the joy of the preparation and arrival of my first child.
God was so faithful to protect me and Kayleigh during the whole pregnancy, and to bring her safely into our world three months ago. He has provided for us even when we're not sure how we're going to make ends meet, and we know that He will continue to take care of us.
2011 was a year of changes. Jobs, homes, moving from "just" being husband and wife to also being dad and mom. As exciting and wonderful as this year was, I know that next year will be even more exciting. Kayleigh's first steps, first words...so many firsts! As I tucked Kayleigh into bed tonight, I teared up. For some reason, it breaks my heart to put a close to the year she was born. How did that happen so quickly? It's only been three months, but it's been three beautiful, treasured, wonderful months. The coming of a new year means that my baby is going to grow even more. I wish I could keep her as this precious, soft, pink little armful. But I'm also excited to watch her experience new things, to be there for so many of her firsts. To teach her so many wonderful things.
God is good. He provides for us, He leads us, He gives us challenges among the wonderful.
As this year comes to an end, I'm going to go join my family and enjoy our homemade pizza and reminiscing.
Blessings to you in 2012! See you soon :)
Saturday, December 31, 2011
Friday, December 23, 2011
Kayleigh's First Christmas
Guess what, Kayleigh Grace?
It's your very first Christmas!
You may not understand much about it this year...
But Daddy and I are looking forward to celebrating our favorite Christmas traditions with you as you grow up.
(not that there is any hurry, sweet one)
Merry Christmas, Kayleigh Girl!
Thursday, December 22, 2011
Jingle Bells
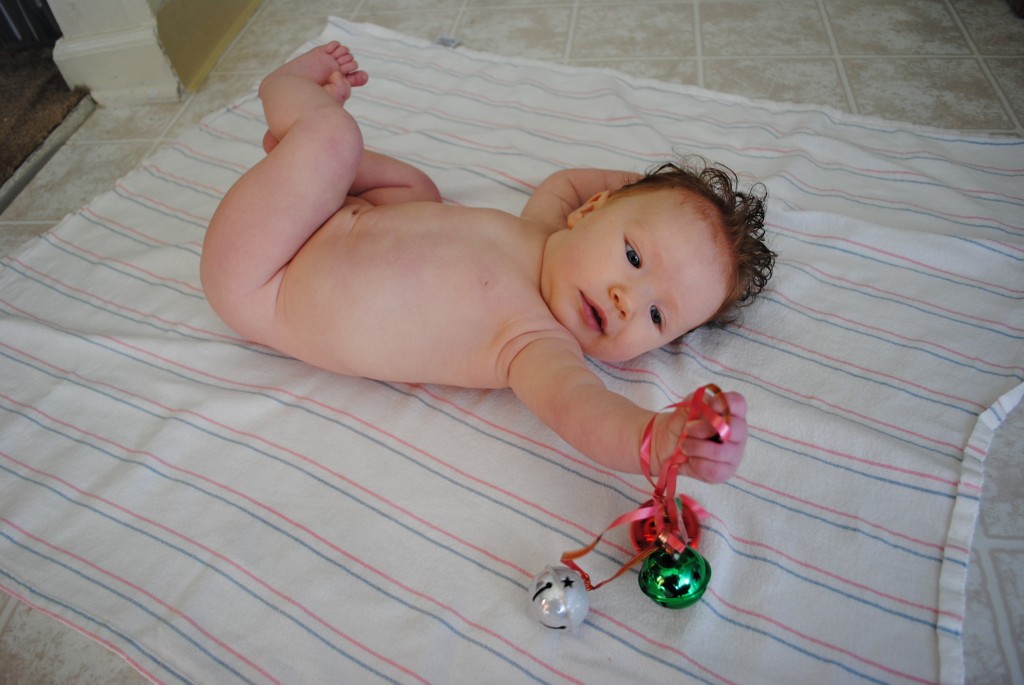
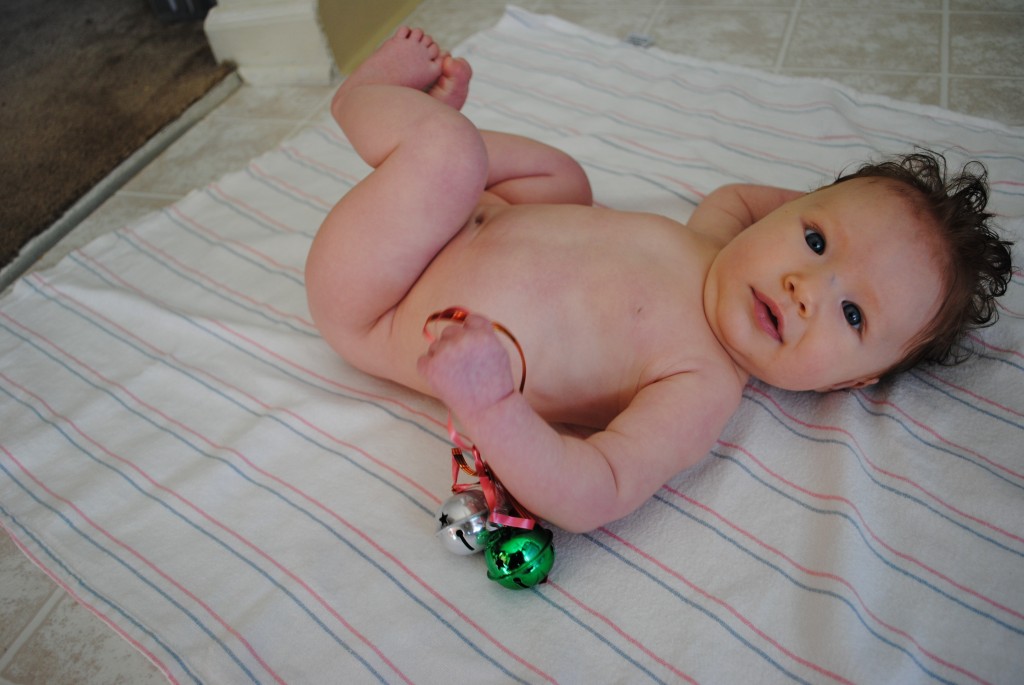
Kayleigh has a new favorite toy.
She doesn't know how to pick them up by herself, and she doesn't know how to put them down, but put a string of jingle bells in her hand, and she'll be content with waving it around for at least half an hour.
100% happy baby having nudie time and playing with the decorations straight off of a Christmas present.
Seriously, why does anybody spend money on newborns at Christmas?
Two Years
I realized with surprise today that it's the 22nd. Two years ago today, my grandfather, Papa Chuck died. Those last few months of his life--heart-wrenching, guilt-inflicting, terrifying--ended with peace, and a Promise of redemption. God is so good!
My papa was a kind, generous man with a laugh that shook the walls. He was the kind of man who would go sit and keep his neighbor's dog company while the man went to the doctor. He was the man who put a vase of garden roses on the breakfast tray he brought in to my Ami every morning. He was the reason I never took my car to a mechanic up until 3 years go. But, this wonderful, loving man had no room in his heart for God. The grandfather who raised my dad (currently a pastor of 19 years) denied Christ up until two days before his death. I praise God every time I think about how He saved my Papa and brought him home to Him at last. I'm so thankful!
It's a beautiful testimony of our Father's love, His patience, and His provision. You can read it here.
I wish Papa Chuck had gotten to meet Kayleigh. He would have loved her. I can picture his hearty laugh as he would chuckle at her cute expressions, or the way his strong mechanic's hands would look holding her soft, pink skin.
He was a wonderful grandfather. What a blessing it was to have him for 23 years of my life. Thank you, God!
[caption id="attachment_1328" align="aligncenter" width="290" caption="Papa holding me in his front yard, c 1987"]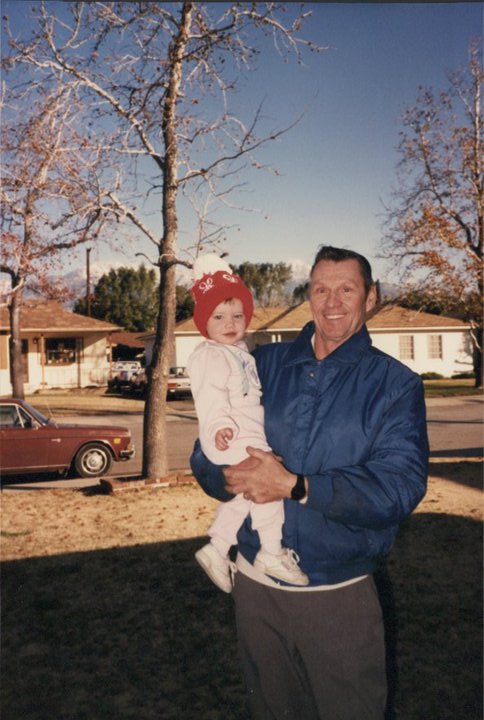 [/caption]
My papa was a kind, generous man with a laugh that shook the walls. He was the kind of man who would go sit and keep his neighbor's dog company while the man went to the doctor. He was the man who put a vase of garden roses on the breakfast tray he brought in to my Ami every morning. He was the reason I never took my car to a mechanic up until 3 years go. But, this wonderful, loving man had no room in his heart for God. The grandfather who raised my dad (currently a pastor of 19 years) denied Christ up until two days before his death. I praise God every time I think about how He saved my Papa and brought him home to Him at last. I'm so thankful!
It's a beautiful testimony of our Father's love, His patience, and His provision. You can read it here.
I wish Papa Chuck had gotten to meet Kayleigh. He would have loved her. I can picture his hearty laugh as he would chuckle at her cute expressions, or the way his strong mechanic's hands would look holding her soft, pink skin.
He was a wonderful grandfather. What a blessing it was to have him for 23 years of my life. Thank you, God!
[caption id="attachment_1328" align="aligncenter" width="290" caption="Papa holding me in his front yard, c 1987"]
 [/caption]
Posted by
Bethany @happyhomemakerme
at
6:21 AM


Two Years
2011-12-22T06:21:00-08:00
Bethany @happyhomemakerme
Comments
Auto Draft
Posted by
Bethany @happyhomemakerme
at
6:02 AM


Auto Draft
2011-12-22T06:02:00-08:00
Bethany @happyhomemakerme
Comments
Thursday, December 15, 2011
Merry [home] Making Series: Christmas Gift Tags
It's the last day of my Merry [home] Making Series! My guest blogger for today is Jenny of Notes from the Plumb Tree. I came upon Jenny's blog pretty randomly over a year ago when I fell in love with her shoes. Jenny creates the most beautiful little shoes I've ever seen, and sells them in her shop on Etsy. Since then, I've come to love not only her shoes, but also the sweet little family she shares about on her blog. Seriously, Hunter, Ainsley, and Tessa are some of the most adorable kids. On the planet. And I really appreciate how she is raising them in a Christ-minded way. It makes me excited to be able to share things with Kayleigh, someday! I hope you enjoy her post, and please go send some love over at Notes from the Plumb Tree!
Christmas Gift Tags
Thank you so much, Bethany, for having me as a guest blogger. Bethany has become a bloggy friend of mine and we have been blogging back and forth for over a year now and I am honored to be posting here. I am a crafting Momma of three littles so that means blog posts are quick and full of the ramblings that go with mothering three crazy monkeys who are constantly up to something while I am in the middle of creating.
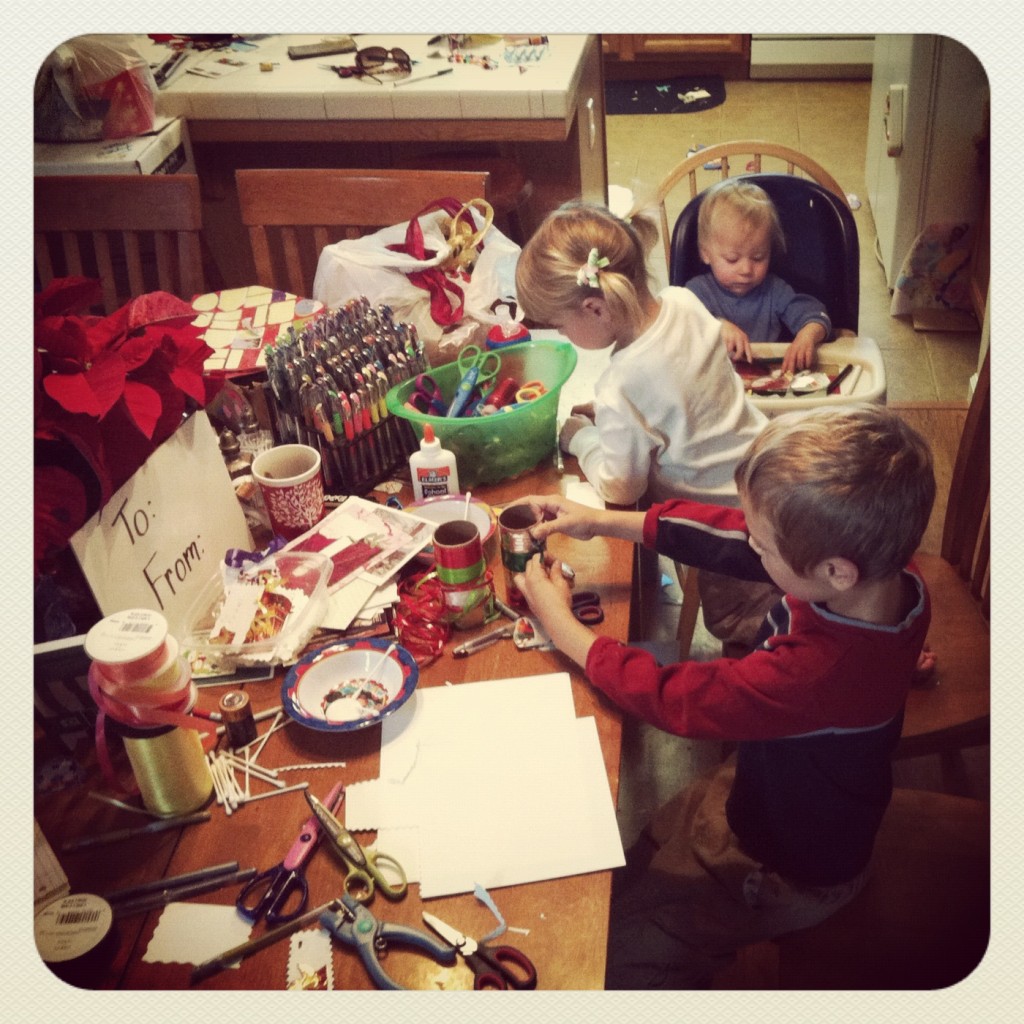
This week I enlisted their help in making Christmas gift tags. Every year I save the Christmas cards that come in the mail in a ziplock bag. The next year I break them out and make them into gift tags.
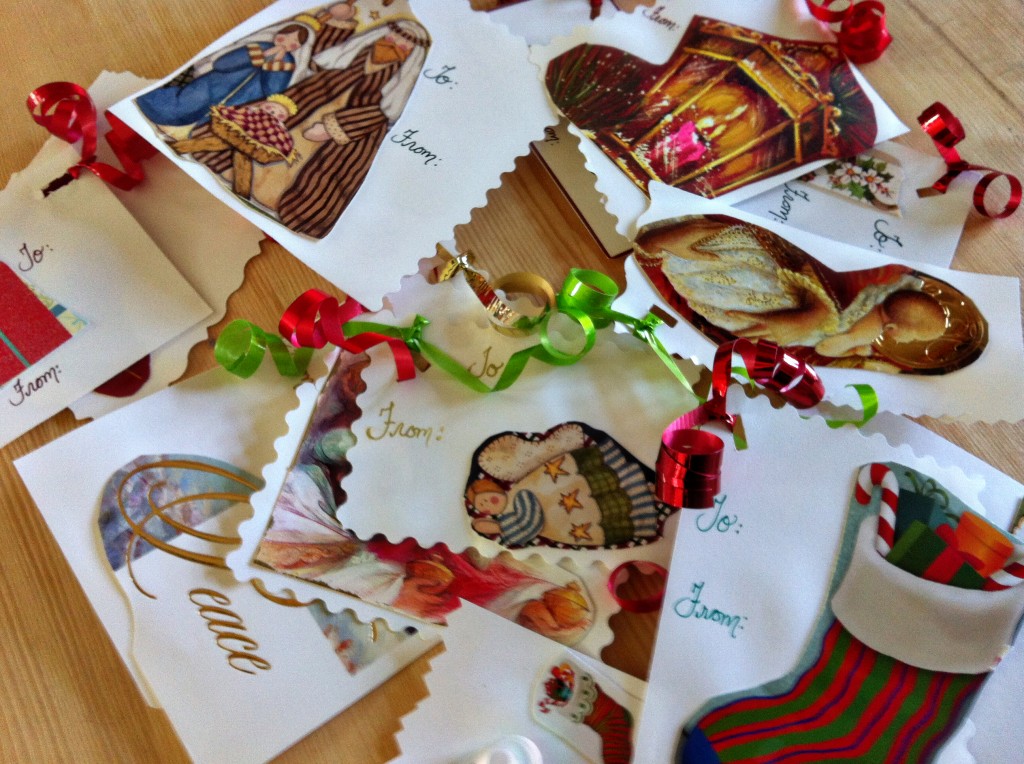
I hate throwing such pretty cards away, so they get repurposed and the pretty pictures on the front are cut out. One card can often make several tags as each pretty piece is cut out separately and glued onto squares of cardstock. Then I punch a hole in the corner and put some pretty curly ribbon through. Sometimes I glue on buttons as well. The kids were recruited this year. (You can read this as the tags are going to look a lot more "homemade" this year and we skipped the buttons, haha!). They helped chop up cards and glue the pictures down on cardstock. I punched holes and put on the ribbon. Hunter wrote "To" and "From" on many of them.
As you can see, we craft very neatly don't we? Anyhow, it was also fun to read who sent us cards last year and think about them again. One especially poignant moment was when I found the card my grandpa sent last year. He passed away in February.
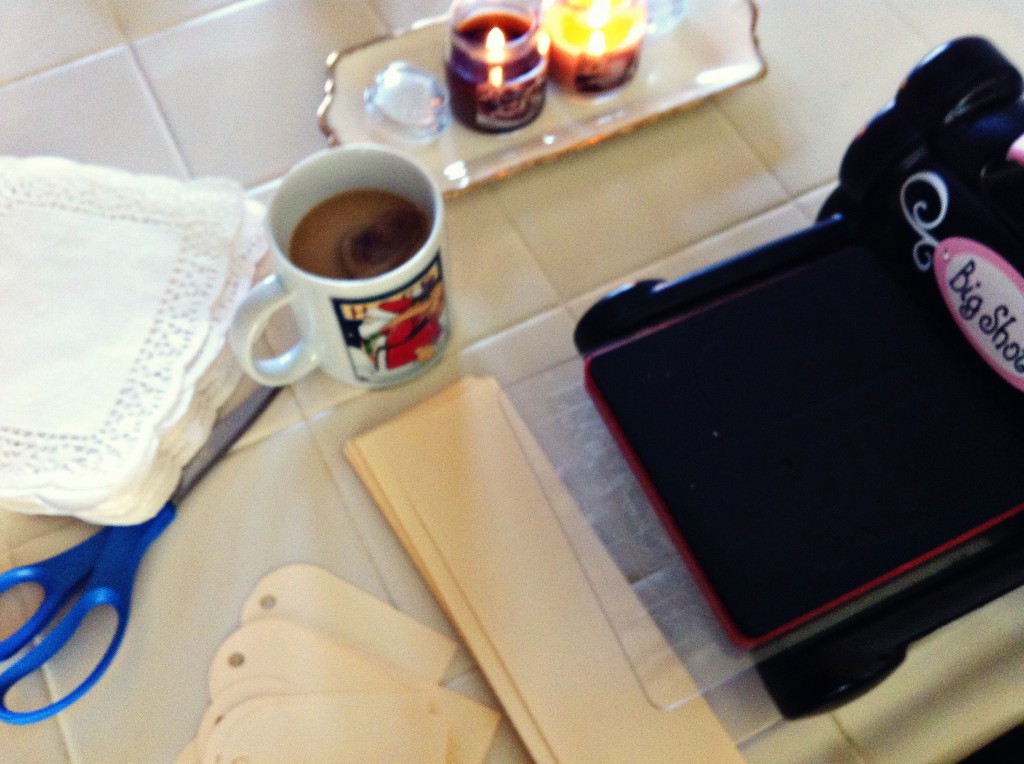
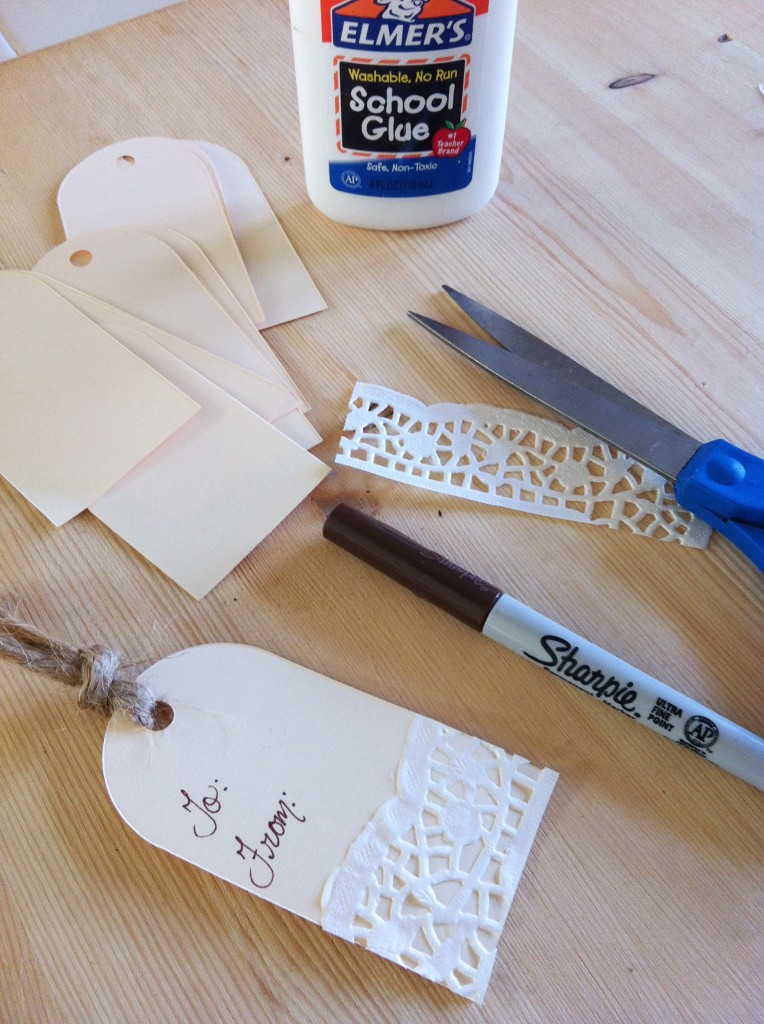
Because I enlisted the help of my children, I thought I also might want some more "grown up" tags for prettier gifts that I may be giving away outside the family. These next few are my "big girl" tags. They are made of cardstock and paper doilies you find in packs at the Dollar store along with some twine. I thought they would be cute with brown paper wrapping. It's sort of a vintage theme.
I fortunately have a sizzix machine that cuts out tags, but you could use regular tags bought at the store. Also, I needed to craft with my gingerbread tea in a holiday mug and Christmas candles. Don't forget that. It's part of the crafting ambiance. Yes, I'm sure the kids are creating chaos somewhere, but in my little crafting bubble of tea and gingerbread candles, peace reigns supreme. Yes, I like my tea strong and leave the tea bag in and also put a good dosing of holiday coffee creamer. Pure crafting bliss. Anyhow...Here I am mid-craft gluing on doily edges to the bottom half of the tags.
And Ta-Da! You have some cute little vintage looking tags for some brown paper packages. It reminds of "brown paper packages tied up with string". Anyhow, they are simple, neutral, and vintage.
Thanks so much for hosting me, Bethany! Merry Christmas from our chaotic crafting house to yours!
Wednesday, December 14, 2011
Merry [home] Making Series: A Handmade Christmas
Welcome to Day 4 of my Merry [home] Making Series! My guest blogger for today is my friend Anya, of Anya's Green Baby. Anya and I met during our freshman year of high school. We've come a long way from rolling backpacks and hanging out in the band room, and I think we actually have more in common these days! Anya is a very talented eco-minded momma of beautiful 7 month old twins who loves her husband, teaches American Sign Language on a college level, and somehow manages to have time to make the beautifully embroidered organic items you can find in her Etsy shop. Please be sure to stop by her blog or shop and say hi!
Each holiday season I am sadly reminded of how our beautiful Christmas presents arrived under my tree. Most of our company made gifts are made overseas by people who are in sweat shops and poorly paid. Beyond that you have the health factor to consider as well. As a new momma I am constantly researching the origins of my babies' items. Remember a few years ago when the media reported that children’s toys had lead paint!?
This year we have more than our usual child labor and lead paint to consider, with the increase in support to the Occupy Wall Street efforts, I began to reconsider my approach to this joyous holiday. Why would I give money to support companies who are corrupt? I would much rather support a stay at home momma like myself who uses the profits to support her family. This final thought forced me to take a fun challenge, a completely handmade Christmas.
I divided this blog post into two sections, this first part is how to do a handmade Christmas yourself even if you are not particularly artistic! The second part is how to find some wallet-friendly artists to make your gifts for you.
These are easy to make and make wonderful gifts! Here are some reasons to go with beeswax over other waxes.
1. Beeswax is a clean burning wax that does not ruin the air quality in your home.
2. It makes your house smell wonderfully of honey
3. Save money and the planet by conserving energy with a little mood lighting
4. Low impact, high reward
Before I began this project I knew that I wanted fresh, raw wax from a eco-minded bee keeper. After some research I found Owl Naturals on Etsy.
So here is how to create your very own candles in 8 simple steps.
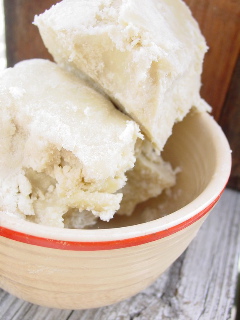
Step 1 - break your beeswax into smaller pieces and place them in a glass bowl or cup
Step 2 - place the cup of wax pieces in a pot filled with water, make sure the cup weighs more then the water so it will not tip over!
Step 3 - bring the water to a boil and then lower the temperature to a medium setting, let the wax melt slowly and wait until all the pieces are melted before moving on.
Step 4 - while the wax is melting cut the right length of wicking for the mold you want to use. Dip the wick once in the wax to give it a single coat, this will prevent the wick soaking up the wax for the candle.
Step 5 - if you are not planning on burning the candle in the mold then you must rub a tiny bit of oil on the inside of the mold so the candle will release from the sides.
Step 6 - place a tiny dot of wax at the bottom of your mold and stick your wick to the wax by using a stick of some kind, I used a BBQ kabob stick. Now place another stick across the top of the mold and use a bobby pin to hold the top of the wick to the stick. This will prevent the wick from slipping down while the wax cools.
Step 7 - carefully pour the wax into the mold in one motion, do not pause or you will get a crack in your candle. Make sure that the wick is still position in the middle of the candle and let it sit for a few hours.
Step 8 - remove the bobby pin and stick, turn the mold upside down and gently hit the bottom of the mold so the candle will fall into your hand. If it does not come out you can push down on the candle gently to break it away from the walls.
Even people that are all thumbs at a sewing machine can pull off this craft project! Your local fabric store will have some soft and fun options for terry cloth and you can also pick out some fun cotton patterns you think your gift receiver will enjoy. Use a dish towel or burp cloth you already have to measure the size and cut out your rectangles. When you are finished cutting the terry, cut a skinny rectangle of your cotton fabric. Iron the edges of the cotton fabric back on itself so your cut edge is hidden under the square and sew the rectangle on to the terry. When you are finished roll the edge of the terry twice so your edge is hidden and sew all the way around the cloth. If you want to cheat a little most craft stores have plain dish cloths with clean edges that you can purchase and decorate from there.
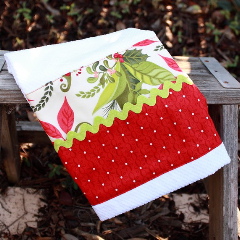
This part was supposed to be do it yourself but if you like these ideas and still don’t want to do the candles and towels yourself, here are links to some shops where you can buy these gifts!
Candles - www.owlnaturals.etsy.com
Towels - www.terrancehill.etsy.com
I hope this inspires you to make some gifts yourself! Happy Holidays :)
:)
A Handmade Christmas
Each holiday season I am sadly reminded of how our beautiful Christmas presents arrived under my tree. Most of our company made gifts are made overseas by people who are in sweat shops and poorly paid. Beyond that you have the health factor to consider as well. As a new momma I am constantly researching the origins of my babies' items. Remember a few years ago when the media reported that children’s toys had lead paint!?
This year we have more than our usual child labor and lead paint to consider, with the increase in support to the Occupy Wall Street efforts, I began to reconsider my approach to this joyous holiday. Why would I give money to support companies who are corrupt? I would much rather support a stay at home momma like myself who uses the profits to support her family. This final thought forced me to take a fun challenge, a completely handmade Christmas.
I divided this blog post into two sections, this first part is how to do a handmade Christmas yourself even if you are not particularly artistic! The second part is how to find some wallet-friendly artists to make your gifts for you.
Beeswax Candles
These are easy to make and make wonderful gifts! Here are some reasons to go with beeswax over other waxes.
1. Beeswax is a clean burning wax that does not ruin the air quality in your home.
2. It makes your house smell wonderfully of honey
3. Save money and the planet by conserving energy with a little mood lighting
4. Low impact, high reward
Before I began this project I knew that I wanted fresh, raw wax from a eco-minded bee keeper. After some research I found Owl Naturals on Etsy.
So here is how to create your very own candles in 8 simple steps.

Step 1 - break your beeswax into smaller pieces and place them in a glass bowl or cup
Step 2 - place the cup of wax pieces in a pot filled with water, make sure the cup weighs more then the water so it will not tip over!
Step 3 - bring the water to a boil and then lower the temperature to a medium setting, let the wax melt slowly and wait until all the pieces are melted before moving on.
Step 4 - while the wax is melting cut the right length of wicking for the mold you want to use. Dip the wick once in the wax to give it a single coat, this will prevent the wick soaking up the wax for the candle.
Step 5 - if you are not planning on burning the candle in the mold then you must rub a tiny bit of oil on the inside of the mold so the candle will release from the sides.
Step 6 - place a tiny dot of wax at the bottom of your mold and stick your wick to the wax by using a stick of some kind, I used a BBQ kabob stick. Now place another stick across the top of the mold and use a bobby pin to hold the top of the wick to the stick. This will prevent the wick from slipping down while the wax cools.
Step 7 - carefully pour the wax into the mold in one motion, do not pause or you will get a crack in your candle. Make sure that the wick is still position in the middle of the candle and let it sit for a few hours.
Step 8 - remove the bobby pin and stick, turn the mold upside down and gently hit the bottom of the mold so the candle will fall into your hand. If it does not come out you can push down on the candle gently to break it away from the walls.
Dish Towels and Burp Cloths
Even people that are all thumbs at a sewing machine can pull off this craft project! Your local fabric store will have some soft and fun options for terry cloth and you can also pick out some fun cotton patterns you think your gift receiver will enjoy. Use a dish towel or burp cloth you already have to measure the size and cut out your rectangles. When you are finished cutting the terry, cut a skinny rectangle of your cotton fabric. Iron the edges of the cotton fabric back on itself so your cut edge is hidden under the square and sew the rectangle on to the terry. When you are finished roll the edge of the terry twice so your edge is hidden and sew all the way around the cloth. If you want to cheat a little most craft stores have plain dish cloths with clean edges that you can purchase and decorate from there.

This part was supposed to be do it yourself but if you like these ideas and still don’t want to do the candles and towels yourself, here are links to some shops where you can buy these gifts!
Candles - www.owlnaturals.etsy.com
Towels - www.terrancehill.etsy.com
I hope this inspires you to make some gifts yourself! Happy Holidays
 :)
:)
Tuesday, December 13, 2011
Merry [home] Making Series: Fabric Gift Bags
It's day 3 of my Christmas Craft Series, "Merry [home] Making," and I'm very excited to get to introduce to you my wonderful blog friend, Megan of The Sandefur Family. Megan is a sweet and talented woman who is working hard on renovating her home with her husband, Addison. She shares their day-to-day victories with their house, moments spent with family, and craft endeavors. She always leaves the sweetest comments on my blog, and is such an encouragement to me! Please be sure to go visit her site and say hi!
I’m Megan from The Sandefur Family and Bethany has asked me to guest post today! When she contacted me to see if I’d participate in her DIY series I was flattered!
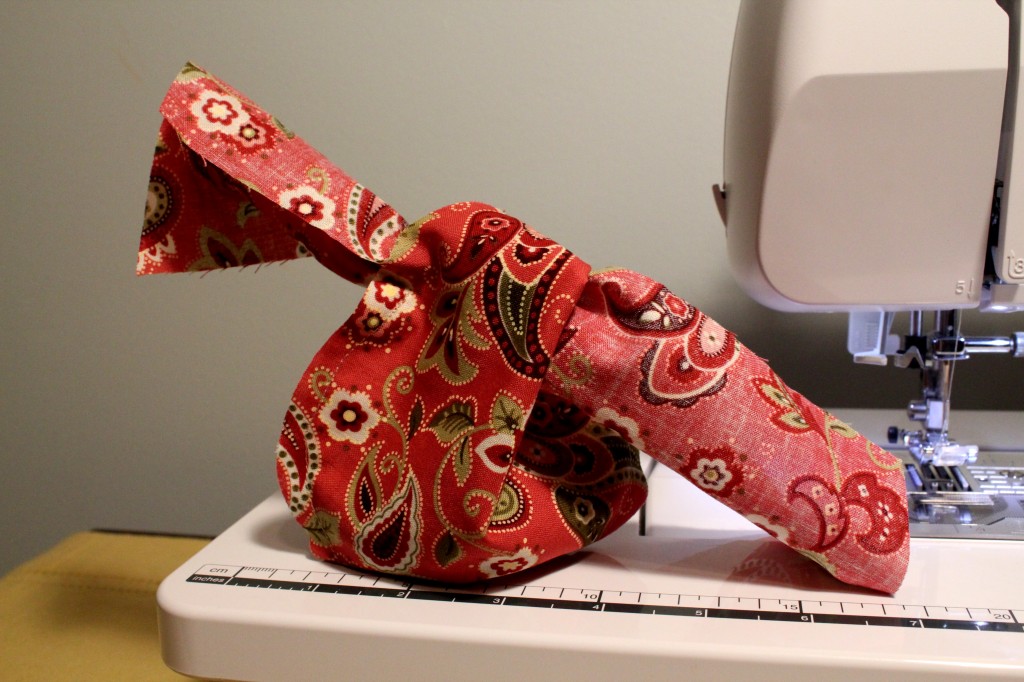
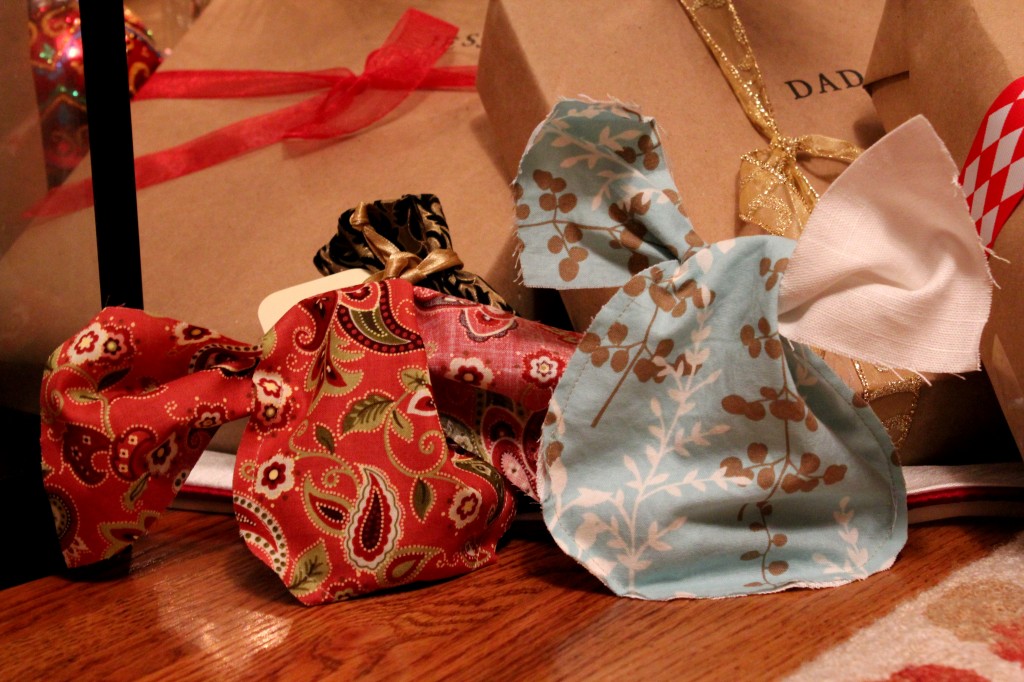
So, today I’m going to share how I make small fabric bags for wrapping jewelry to give as gifts. My mom suggested that I stitch up these little bags for gift giving earlier in the year and they’ve been a hit! This project falls on a novice/beginner level and I love the instant gratification!
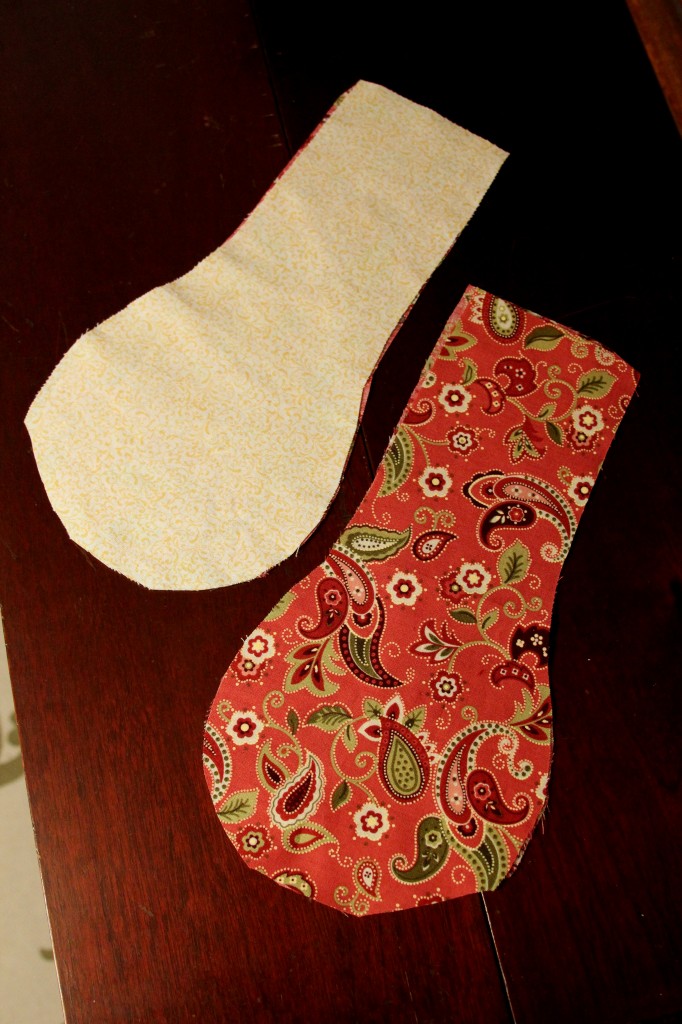
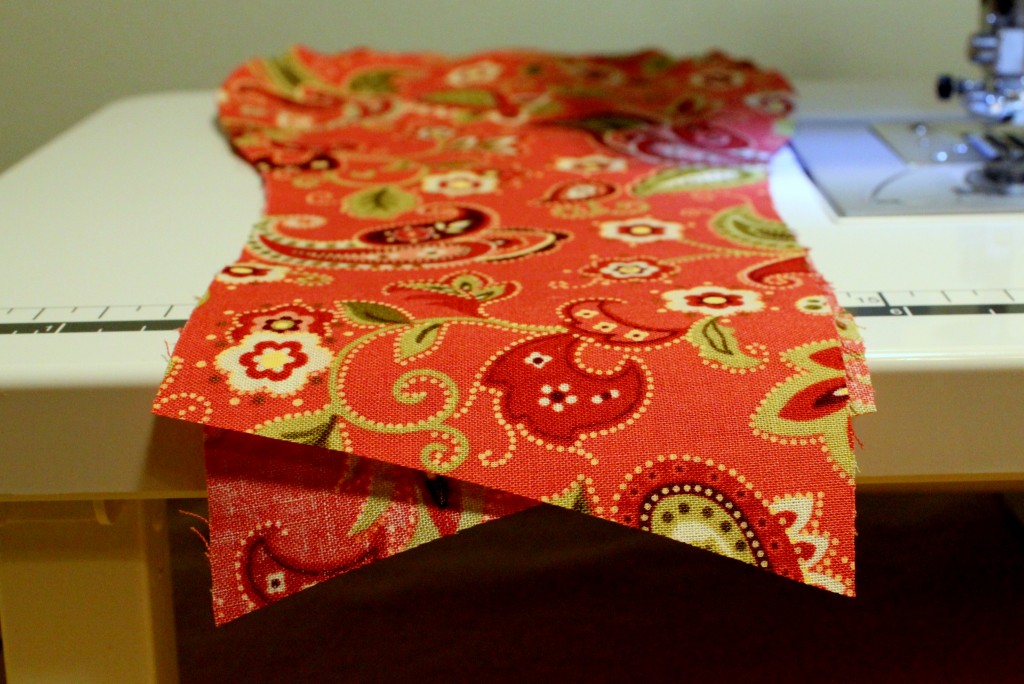
My favorite thing about this little project is that the bags can be made from scraps of fabric that are on-hand and I don’t have to buy a single thing. I stack four pieces of fabric together and cut out a rough template. I cut at least two patterns out at a time to make the process faster. Since I leave the edges rough, I often come back and trim a second time after the bag has been stitched together to make it look a bit neater.
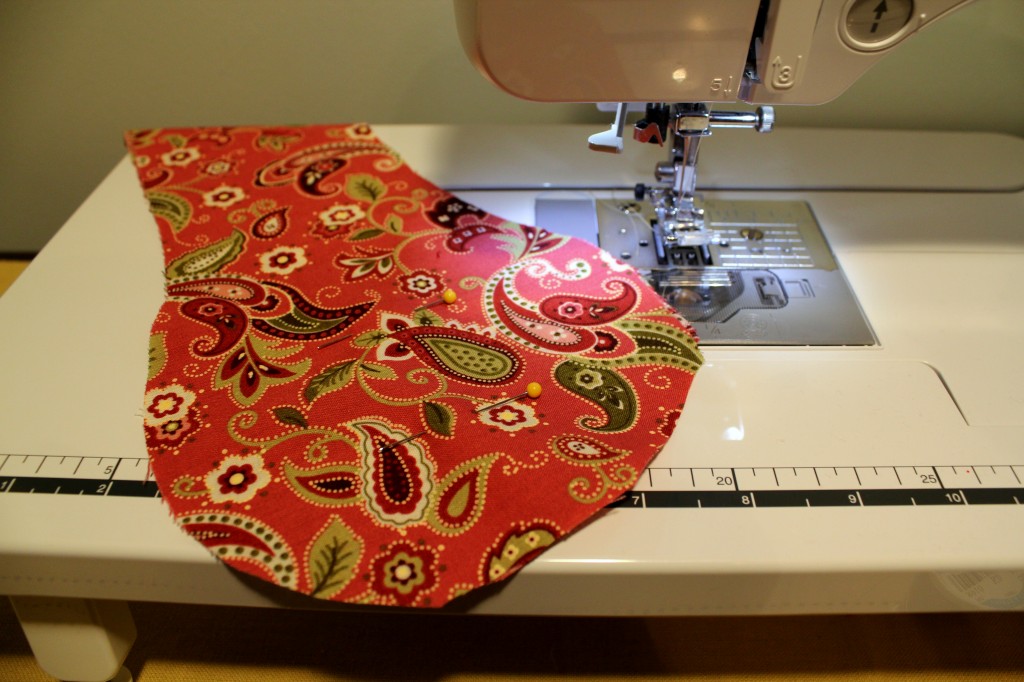
After the pieces have been cut, pair them and pin in two places to keep them together.
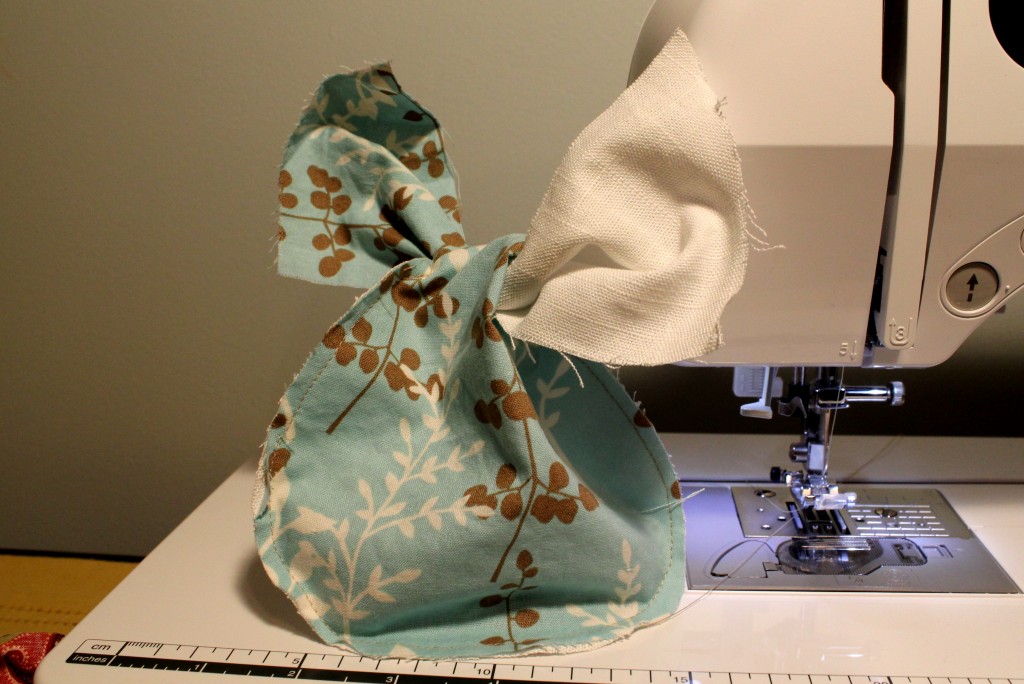
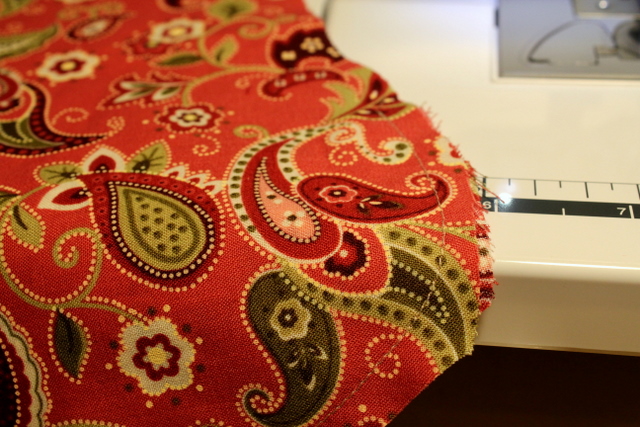
Then stitch around the circular portion of the material to make a small bag, making sure to leave enough room for a hand to slip down inside and retrieve whatever is in the bag. This is where I trim around the circular portion of the bag a second time to clean it up a bit.
Easy, right? If you’ve got the time you can make dozens of these little bags for gift giving. I've made quite a few this year and love all the possible fabric combinations. Now go put them under your tree!
Merry Christmas!
Fabric Gift Bags
I’m Megan from The Sandefur Family and Bethany has asked me to guest post today! When she contacted me to see if I’d participate in her DIY series I was flattered!
So, today I’m going to share how I make small fabric bags for wrapping jewelry to give as gifts. My mom suggested that I stitch up these little bags for gift giving earlier in the year and they’ve been a hit! This project falls on a novice/beginner level and I love the instant gratification!
My favorite thing about this little project is that the bags can be made from scraps of fabric that are on-hand and I don’t have to buy a single thing. I stack four pieces of fabric together and cut out a rough template. I cut at least two patterns out at a time to make the process faster. Since I leave the edges rough, I often come back and trim a second time after the bag has been stitched together to make it look a bit neater.
After the pieces have been cut, pair them and pin in two places to keep them together.
Then stitch around the circular portion of the material to make a small bag, making sure to leave enough room for a hand to slip down inside and retrieve whatever is in the bag. This is where I trim around the circular portion of the bag a second time to clean it up a bit.
Easy, right? If you’ve got the time you can make dozens of these little bags for gift giving. I've made quite a few this year and love all the possible fabric combinations. Now go put them under your tree!
Merry Christmas!
Monday, December 12, 2011
Merry [home] Making Series: Pleated Flower
Welcome to Day 2 of my Christmas Craft Series, Merry [home] Making!
Today, I'm very excited to introduce you to Whitney of Elm Street Life. Whitney's blog is one of my favorite respites. Whenever I need to just sit in front of the computer and be refreshed, I love clicking to her site to look at her beautiful pictures, read about her life with her husband Shawn, be inspired by her beautiful DIYs, and be continually reminded through her words about the love my Savior has for me.
I was tickled pink when she agreed to do a DIY for my Christmas series! I hope you are inspired.
Hi to Bethany's sweet readers! I'm Whitney from Elm Street Life and I am honored to be here with a really easy DIY that is so versatile.
Here are the supplies you'll need:
Fabric scraps in two colors (You only need a maximum 1/8 yard of two different fabrics)
A small piece of felt for backing
Pearls or beads for the center
Sewing needle
Sewing machine
Iron
Scissors
Elastic (optional)
1. Choose the fabric you'd like to use for the outside of your flower.
2. Cut a strip or two out of your outside fabric that's approximately 2 inches wide.
3. Fold your strip in half lengthwise and iron so you have a crisp edge.
4. Sewing along the raw edges of your fabric, pleat your fabric as you sew. I just push the fabric under right before it goes under the needle, about every 5 to 10 stitches. The pleats don't have to be perfectly even at all.
5. Once you've pleated, this is what you should have: a strip or two of pleated outside fabric with the folded edge on the outside.
6. For the inside fabric color, repeat steps 1 through 4. I really liked the frayed look of this gray fabric so I chose to leave the raw edge on the outside, but it's up to you!
7. Cut a circle out of felt (for the backing) approximately 3" across.
8. Pin your pleated strip to the outside of the felt circle and sew along the original stitch line. Repeat until you go around the circle at least 2 or 3 times.
9. At this point, you should have 2 or 3 layers of pleated rows.
10. Using the same technique, add the other color to the inside.
11. Choose which color beads/pearls you'd like to use. I chose a soft gray pearl for this one.
12. Hand sew the beads or pearls to the inside of the flower and you're done! The options are endless once you've finished your flower. Add a piece of elastic, like I did, by hand sewing a piece of elastic to the back of your flower. Or hot glue a pin onto the back and wear it on your shirt, purse, or scarf!
Merry Christmas to you!
[be sure to visit Whitney's Etsy shop, Brighter Day. 10% of her proceeds go toward bringing justice to victims of slavery, sexual exploitation and other forms of violent oppression.] Thank you, Whitney!
Sunday, December 11, 2011
Merry [home] Making Series: Christmas Bunting Banner
Welcome to the first day of my Christmas Craft Series, Merry [home] Making! I'm so excited to be doing this for the second year in a row, and very pleased to have so many wonderful crafters/bloggers sharing their ideas with you this week. It's going to be a lot of fun!
My first guest blogger is Bonnie, a sweet wife, and mother to her beautiful little Elora. I met Bonnie when her husband's childhood friend married my childhood friend last year. We discovered that we both love crafting and blogging, and have been blog buddies ever since. Bonnie is an incredible seamstress, and makes beautiful little outfits for her daughter. She also enjoys making custom orders through her Etsy shop, so if you need a special outfit, a pretty bag, a cute bow tie for your little guy, or a headband for your sweetie pie, be sure to talk with her!
My first guest blogger is Bonnie, a sweet wife, and mother to her beautiful little Elora. I met Bonnie when her husband's childhood friend married my childhood friend last year. We discovered that we both love crafting and blogging, and have been blog buddies ever since. Bonnie is an incredible seamstress, and makes beautiful little outfits for her daughter. She also enjoys making custom orders through her Etsy shop, so if you need a special outfit, a pretty bag, a cute bow tie for your little guy, or a headband for your sweetie pie, be sure to talk with her!
Scalloped Christmas Bunting Banner
Hello, Happy Homemaker Me readers, my name is Bonnie and I am so glad to be here on Bethany's blog today, what a privilege! Normally, you can find me over at The Pretty Bitty Blog, but today I'm posting my very first tutorial here on Happy Homemaker Me.
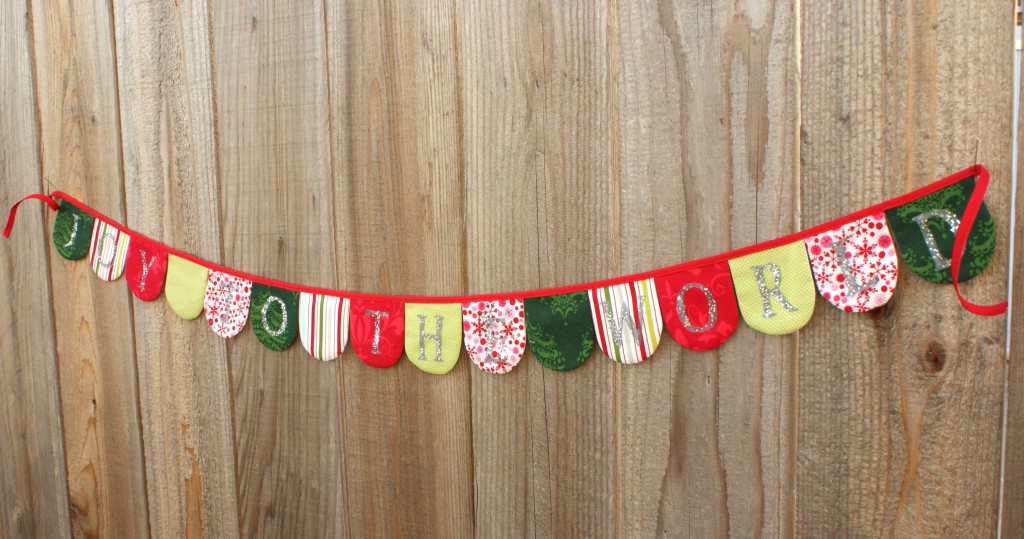
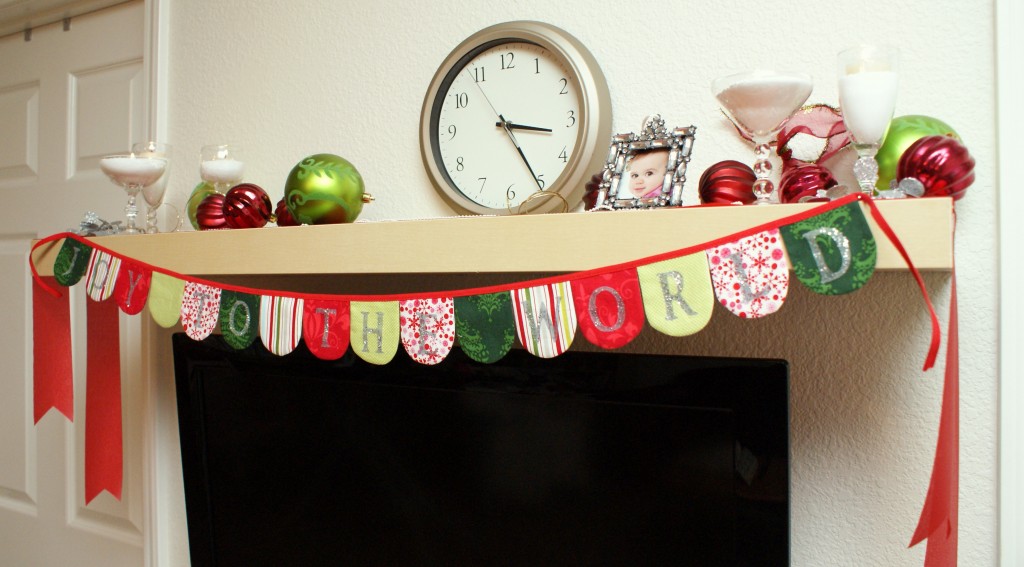
I am going to show you how to make a fun little Christmas bunting banner.
First, gather up some supplies.
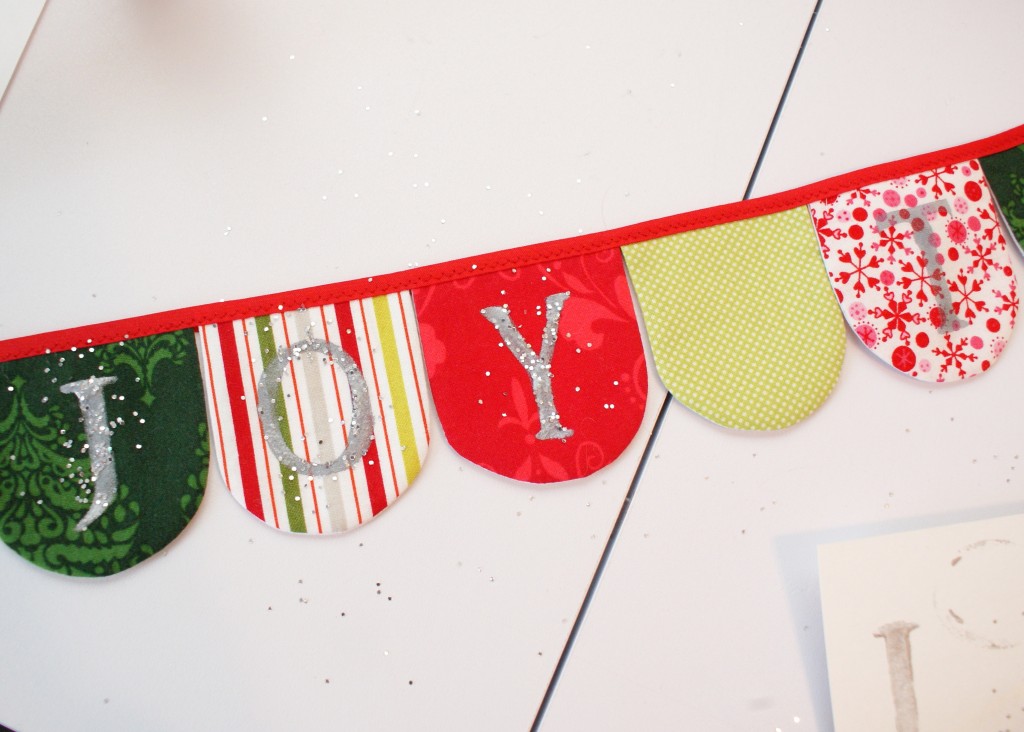
To make a "Joy to the World" banner, here's what you'll need:
16 3"x3" squares of fabric for the front- I used 5 different prints, so I had 4 squares of one print, and 3 squares of all the others
16 3"x3" squares of backing fabric- I used a white cotton
55" of 1/4" double fold bias tape
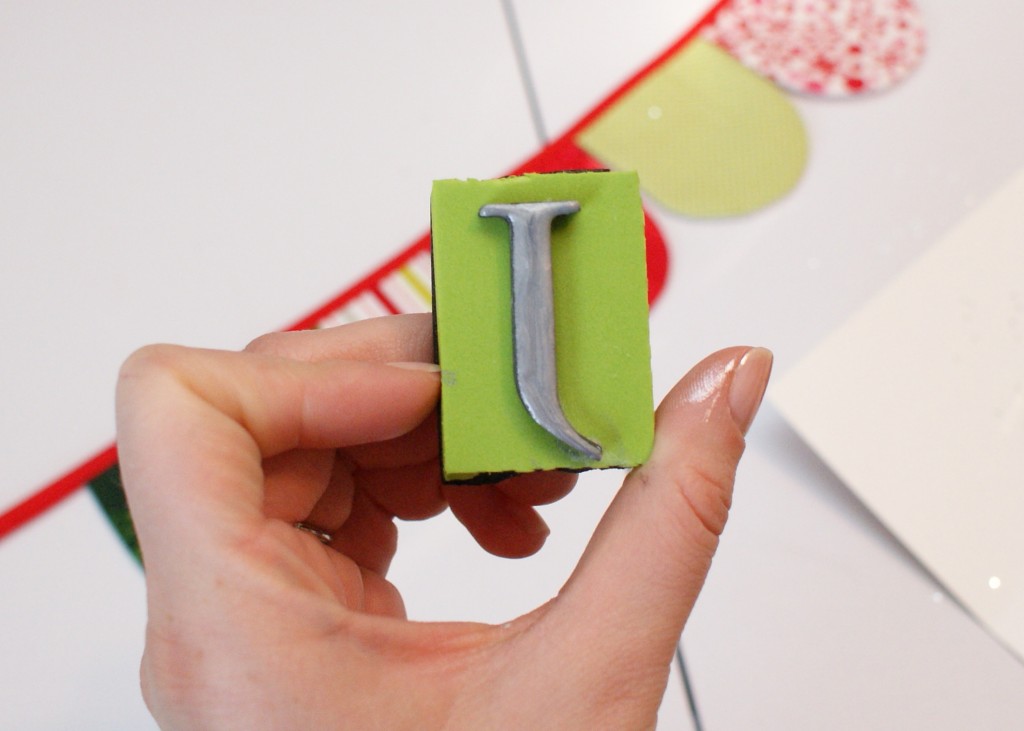
Letter stamps
Acrylic Paint- I chose silver
Glitter- if you want some sparkle
Paint brush
Rotary cutter, mat, and ruler
And the sewing basics: sewing machine, thread, scissors, iron
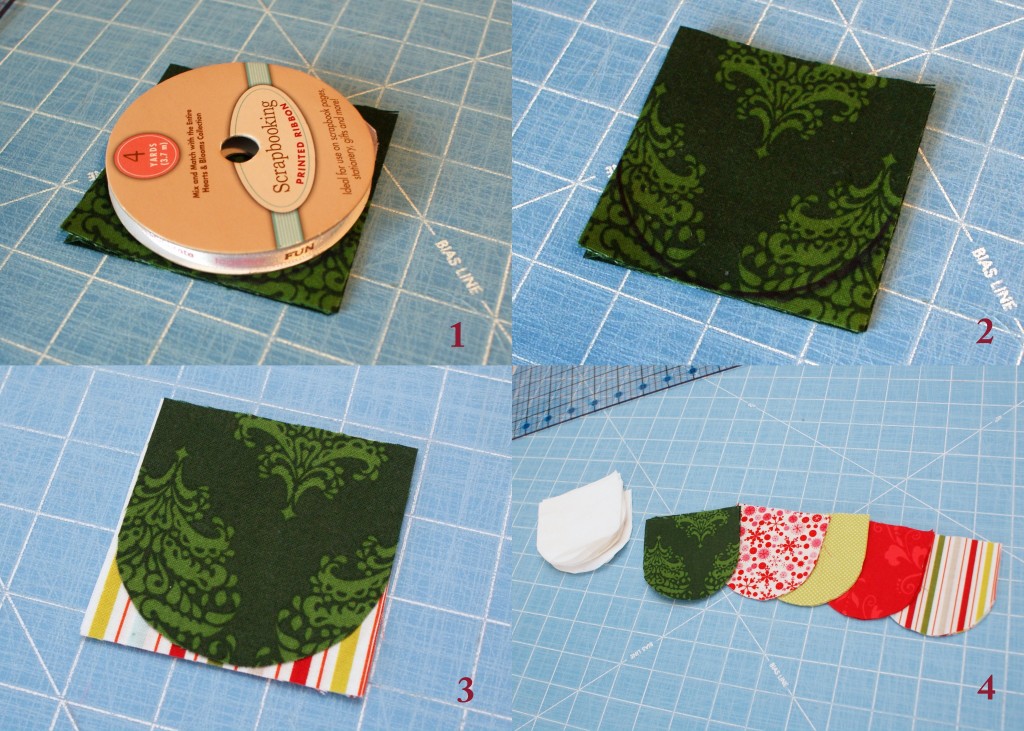
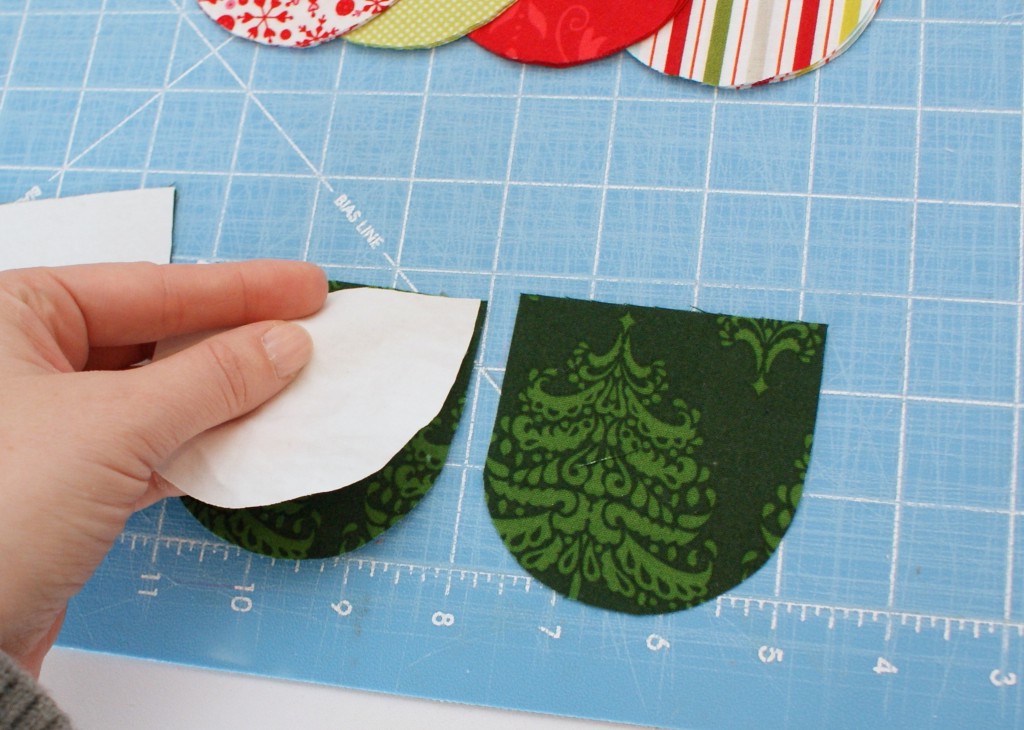
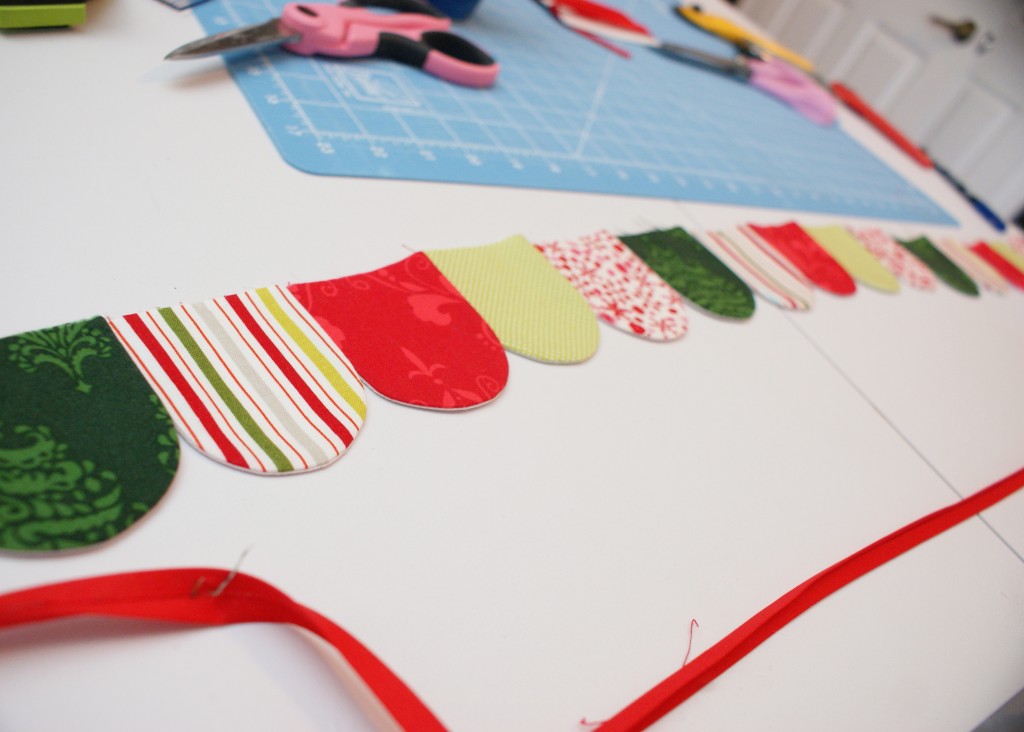
Now let's get started! Once you've cut all of your fabric squares, you need to round the bottom of each piece to give it that cute little scalloped look. If you're really good at eyeing things like this, you can do that, but, I am horrible at it. So I always find something laying around with the shape I need, sometimes it's a cup, sometimes a plate, this time, a spool of ribbon.
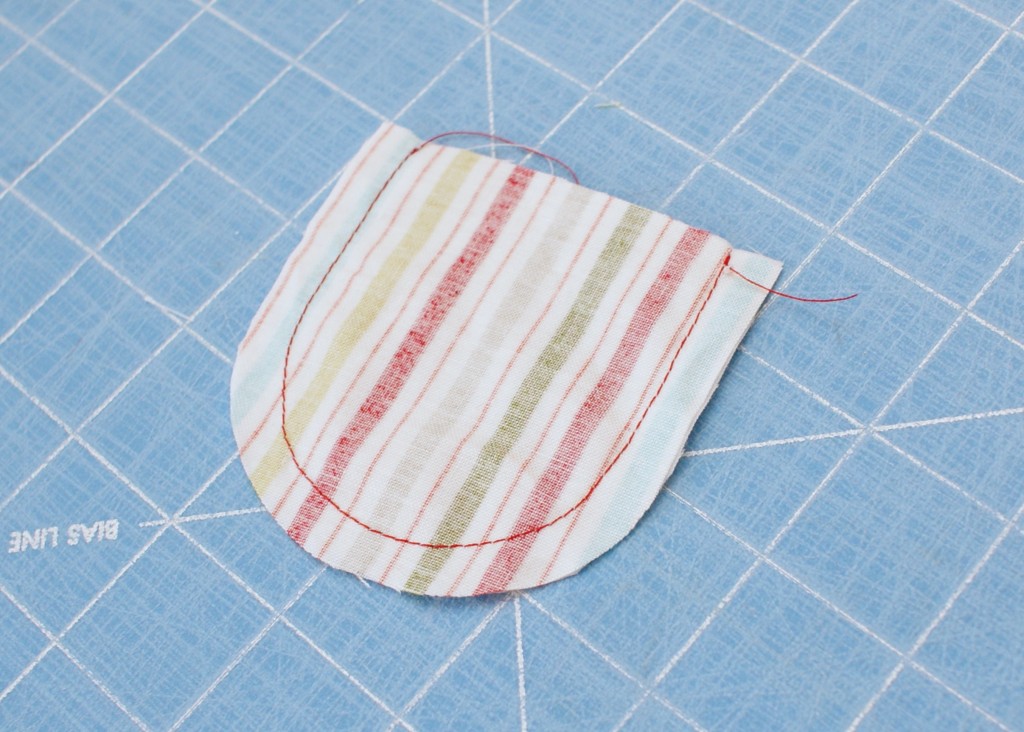
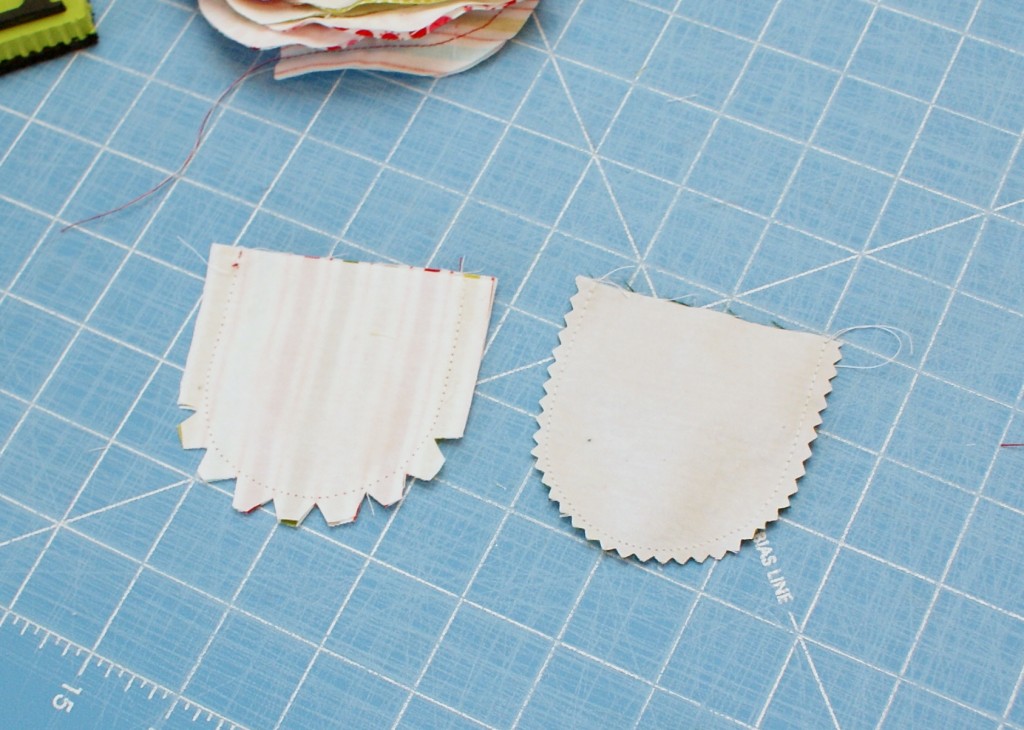
Place the round item of your choosing on one of the squares and trace around it, then cut on the line. Use this piece of fabric for the template to cut the rest of your scallops. I cut through 3-4 at a time to speed things up.
Next, assemble each flag, placing one print fabric and one backing fabric right sides together.
Using 1/4" seam allowance, sew around the edge of each flag leaving the top open for turning.
After you've sewn all of the pieces, you'll need to clip the rounded part of each little flag. If you have pinking shears, they work great for this! Just cut all the way around the scallop close to the stitches, being careful not to cut into the stitching. If you don't have pinking shears, you can do this the proper way. Using some sharp scissors, cut little Vs all around the curve on the bottom of the flag. Clipping the curves, whether with pinking shears or the V cuts, removed the excess fabric that would get bunched up in your nice little curve when you turn the flags right side out.
Now we're going to turn each flag right side out and press them. Then lay the flags out in the order you want them in for the banner.
Once you have them all put in order, pick up the first one and stack each proceeding flag beneath it, in order. You want to keep them in the right order so that when you sew them on you don't have to think about what goes where, just take off the top of the pile as you assemble the banner.
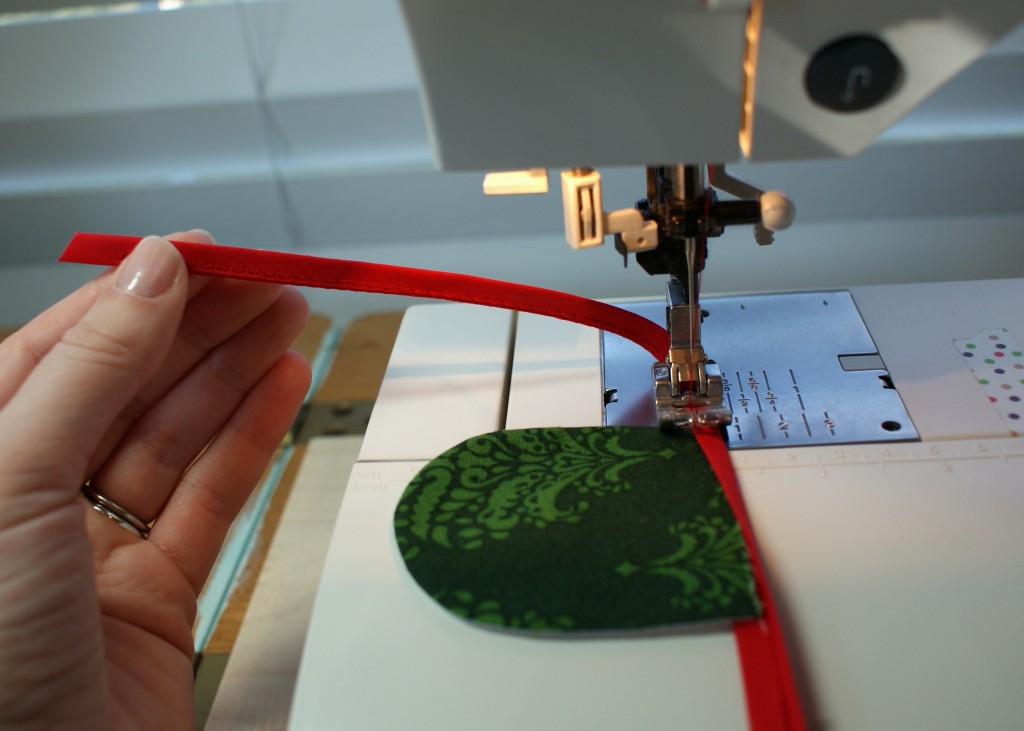
Take your bias tape and, using a small zigzag stitch, sew about 5 inches, then, with your needle still in the fabric, lift the foot of your sewing machine and place the first flag in the fold of the bias tape. Make sure it's nice and snug at the top crease.
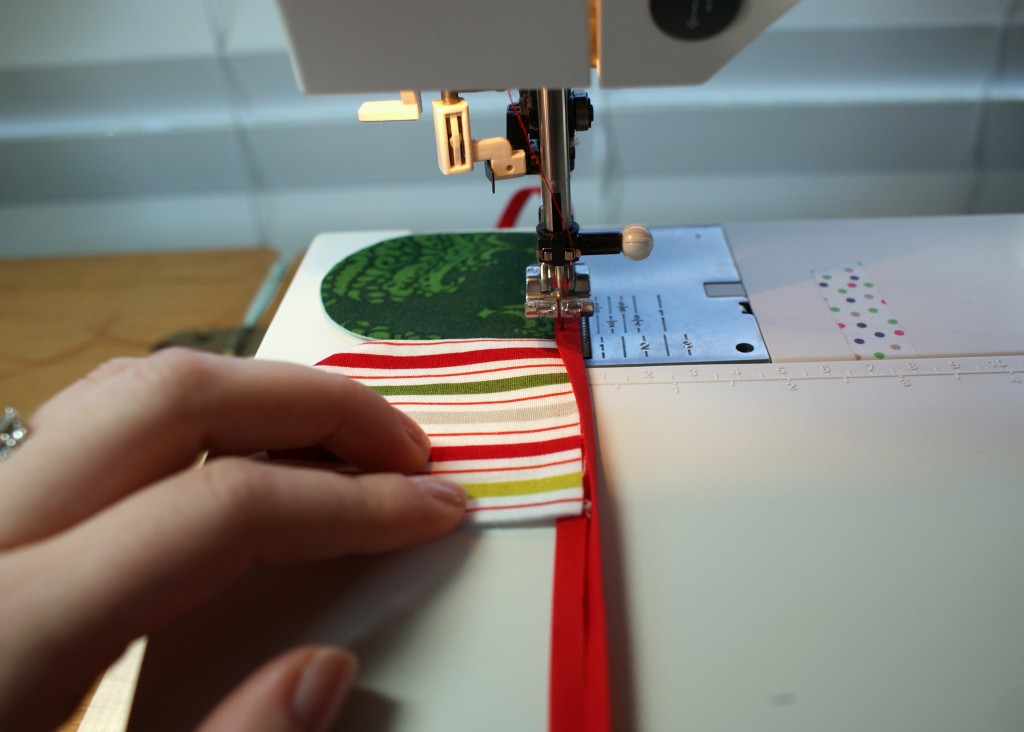
Then, continuing with the zigzag, sew over the flag, just stopping short of the edge. With your needle still in the fabric, lift the foot and place the next flag into the fold of the bias tape. Once again, make sure it's snug at the top crease and also with the flag before it. Continue this process until all of your flags are attached to the bias tape.
And now, we stamp! I'm using some foam stamps, but you can use rubber stamps too, just make sure you wash it really well right after so you don't run in to problems with paint on your stamps. Using the paint brush, apply a liberal amount of pant to your stamp. The fabric wants to absorb the paint so you need to use a lot (and you might want to put some paper under the banner to protect your work surface while you're working with the paint). Carefully stamp each flag with the appropriate letter. It works well if you hold the flag down with a few fingers from one hand while you stamp the letter with the other.
Once you've stamped the whole banner, the first letters should be dry enough to tell whether you need a paint touch up. Due to the fabric absorbing the paint, you will probably need to do a bit of touch up work. Use a paint brush to fill in where needed. After you touch up a letter, sprinkle a bit of glitter on it. I wanted my letters to be slightly sparkly but not thick with glitter so I just sprinkled a "pinch" over each one.
Now, just wait for your banner to dry and find a lovely place to hang it!
Thank you for allowing me to share this tutorial with you. I hope you enjoyed it. Have a very merry Christmas!
Many thanks to Bethany for hosting this holiday series and allowing me to be a part of it! Thank you!
Saturday, December 10, 2011
Merry [home] Making Series
I'm so excited! My second year of Christmas Craft tutorials begins tomorrow! I have some wonderful crafters/bloggers lined up to share their tutorials, and I hope you will be blessed by their ideas!
Join us tomorrow for Bonnie's tutorial on this beautiful Christmas Bunting Banner.
There is more to come--I can't wait!
Join us tomorrow for Bonnie's tutorial on this beautiful Christmas Bunting Banner.
There is more to come--I can't wait!
Posted by
Bethany @happyhomemakerme
at
10:04 PM


Merry [home] Making Series
2011-12-10T22:04:00-08:00
Bethany @happyhomemakerme
Merry [home] Making Series|
Comments
Labels:
Merry [home] Making Series
Friday, December 9, 2011
A Few of My Favorite Things (about Christmas)
Whitney of Elm Street Life shared her Christmas Favorites on Monday, and I thought it would be fun to do the same! I would love it if you would link up at the bottom (haven't figured out the linky thing yet, but if you post your link as a comment, I'll come read it!)
Smell: Apple cider simmering on the stove.
Tradition: Growing up, my family always opened our home on Christmas Day to people in our church who didn't have family nearby. As soon as our presents were opened and put away, we'd dash around getting dressed and preparing for our guests' arrival. Christmas afternoon was always spent sitting around the table doing puzzles as a group, hymn-singing, and listening to the stories of the people from our church. It was a special way to be there for the lonely members of our congregation.
Flower: Amaryllis. I'm not usually one for bulb flowers, but these are so strong and lovely at the same time. I just think they're so pretty!
Movie: I love "It's a Wonderful Life" (anything with Jimmy, really!) and Little Women (maybe that doesn't count as a Christmas movie? I don't know, but I love watching it at Christmastime!)
Hymn: As With Gladness Men of Old
Memory: When I was little, my family would drive out to Ontario to spend a December evening with my Ami and Papa. We would bundle up and drive to Euclid Street, where historic nativity scenes were displayed every year. We would walk from scene to scene, talking about the Story and enjoying the beautiful detailed, very old statues and pieces of the scenes. From there, we would drive to the neighborhood that always put on a huge Christmas lights show. We'd walk around singing Christmas carols and pointing to our favorite Christmas light displays. At the end of the night, we'd go back to Papa and Ami's house, get in our pajamas, and sit at the dining room table sipping hot chocolate and watching Ami's German Advent wreath candles spin shadows around the room. We'd fall asleep listening to the chime of the grandfather clock while we licked away the remnant stickiness of peppermint from around our mouths.
Easy gift: Chocolate covered pretzels. Favorite thing ever!
Sight: All of our funky little handmade ornaments still hanging proudly from Dad and Mom's tree. Seeing their tree is like a walk down memory lane. I love it!
Dislikes: Department store insanity during December. Even more of a reason to give handmade gifts!
My favorite Christmas things...
Smell: Apple cider simmering on the stove.
Tradition: Growing up, my family always opened our home on Christmas Day to people in our church who didn't have family nearby. As soon as our presents were opened and put away, we'd dash around getting dressed and preparing for our guests' arrival. Christmas afternoon was always spent sitting around the table doing puzzles as a group, hymn-singing, and listening to the stories of the people from our church. It was a special way to be there for the lonely members of our congregation.
Flower: Amaryllis. I'm not usually one for bulb flowers, but these are so strong and lovely at the same time. I just think they're so pretty!
Movie: I love "It's a Wonderful Life" (anything with Jimmy, really!) and Little Women (maybe that doesn't count as a Christmas movie? I don't know, but I love watching it at Christmastime!)
Hymn: As With Gladness Men of Old
Memory: When I was little, my family would drive out to Ontario to spend a December evening with my Ami and Papa. We would bundle up and drive to Euclid Street, where historic nativity scenes were displayed every year. We would walk from scene to scene, talking about the Story and enjoying the beautiful detailed, very old statues and pieces of the scenes. From there, we would drive to the neighborhood that always put on a huge Christmas lights show. We'd walk around singing Christmas carols and pointing to our favorite Christmas light displays. At the end of the night, we'd go back to Papa and Ami's house, get in our pajamas, and sit at the dining room table sipping hot chocolate and watching Ami's German Advent wreath candles spin shadows around the room. We'd fall asleep listening to the chime of the grandfather clock while we licked away the remnant stickiness of peppermint from around our mouths.
Easy gift: Chocolate covered pretzels. Favorite thing ever!
Sight: All of our funky little handmade ornaments still hanging proudly from Dad and Mom's tree. Seeing their tree is like a walk down memory lane. I love it!
Dislikes: Department store insanity during December. Even more of a reason to give handmade gifts!
Now it's your turn. What are some of your Christmas favorites?
Thursday, December 8, 2011
How to Plan a Party Using Pinterest
Last Friday night, my friend Stacey and I co-hosted a table at our church's Advent by Candlelight. It's an evening of desserts and devotions centered around Christmas. Women of the congregation sign up to host tables, and then invite friends to sit at their tables. The hostesses decorate their own tables, and let me tell you, some of them take it quite seriously! The evening ends up being a lot like the "Table Settings" part of the county fair, with women walking around from table to table seeing what other people did. It gets kind of crazy. Last year, a woman hired a florist to decorate her table, and this year, one of the tables had a centerpiece that was over 4 feet tall. Some of it gets kind of ridiculous. But the message is always good, bringing us back to remember the importance of Christmas, so I enjoy going anyway.
Stacey and I knew we wanted to host a table so that we could invite some of the newer young ladies at church to join our table, but we had to do it on a budget. A serious budget.
So how did a stay-at-home mommy and a first year teacher decorate their table without spending any money?
Pinterest, of course!
Pinterest has to be one of the best resources out there these days. I've found ideas for Christmas presents, decorations, recipes, even photography ideas. It's awesome! If you've never used Pinterest before, think about signing up. And when you do, find me :)
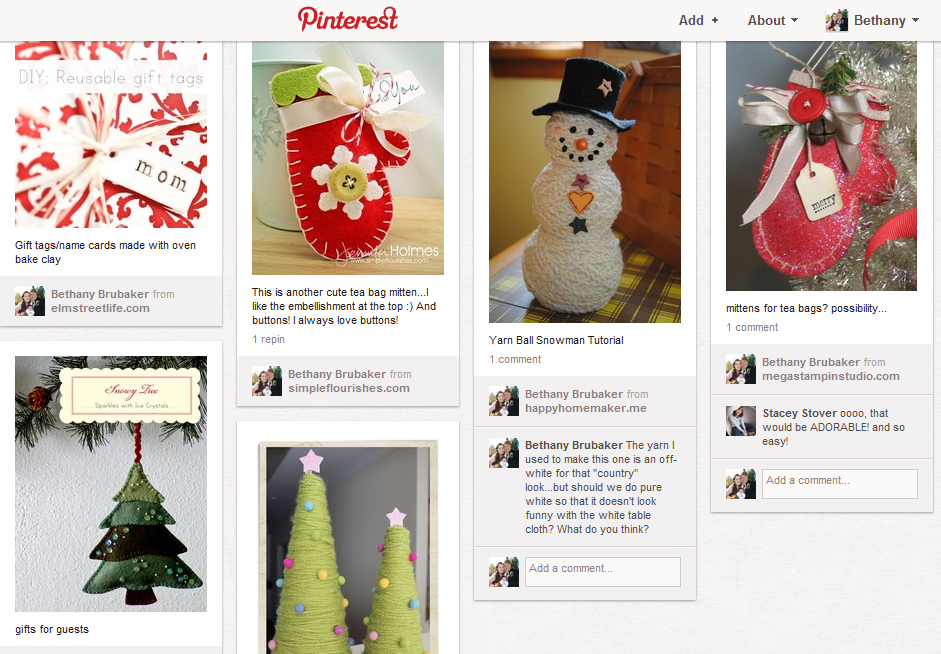
1. Stacey and I created a board specifically for Advent by Candlelight, to which we could both contribute.
Stacey and I knew we wanted to host a table so that we could invite some of the newer young ladies at church to join our table, but we had to do it on a budget. A serious budget.
So how did a stay-at-home mommy and a first year teacher decorate their table without spending any money?
Pinterest, of course!
Pinterest has to be one of the best resources out there these days. I've found ideas for Christmas presents, decorations, recipes, even photography ideas. It's awesome! If you've never used Pinterest before, think about signing up. And when you do, find me :)
Ok, so, how do you plan a party using Pinterest? Easy!
1. Stacey and I created a board specifically for Advent by Candlelight, to which we could both contribute.
2. Once the board was created, we could both search Pinterest and the web for things we liked.
3. The board operated as a way to share ideas with each other and keep everything together in one neat and tidy little space (something we both get a little too excited about!)
Once our board was full of ideas we could put to use, we got together and started crafting.
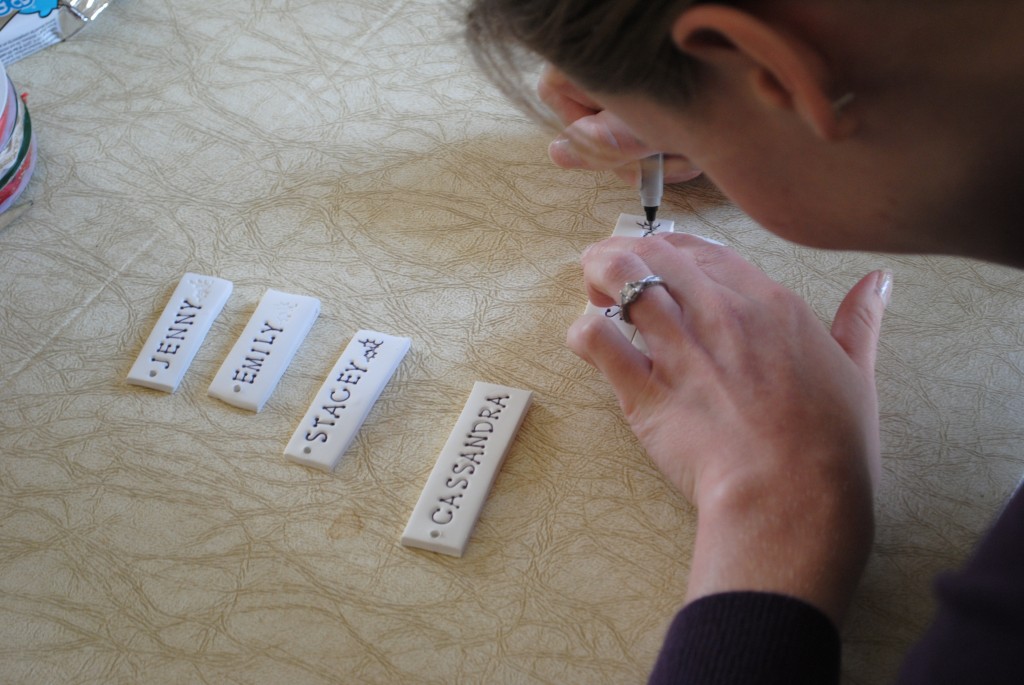
We made name tags using Whitney's tutorial
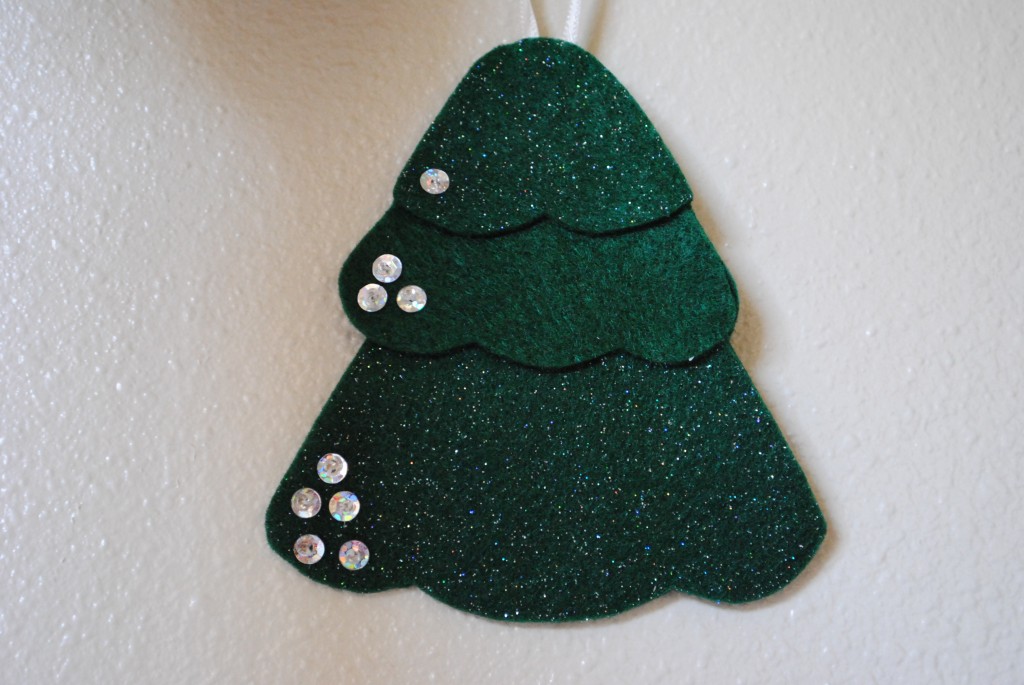
We made pretty felt tree ornaments inspired by Alicia to put at each seat as a gift for the guest
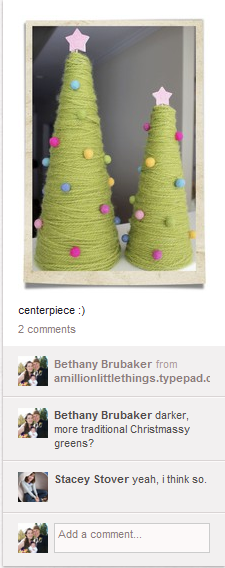
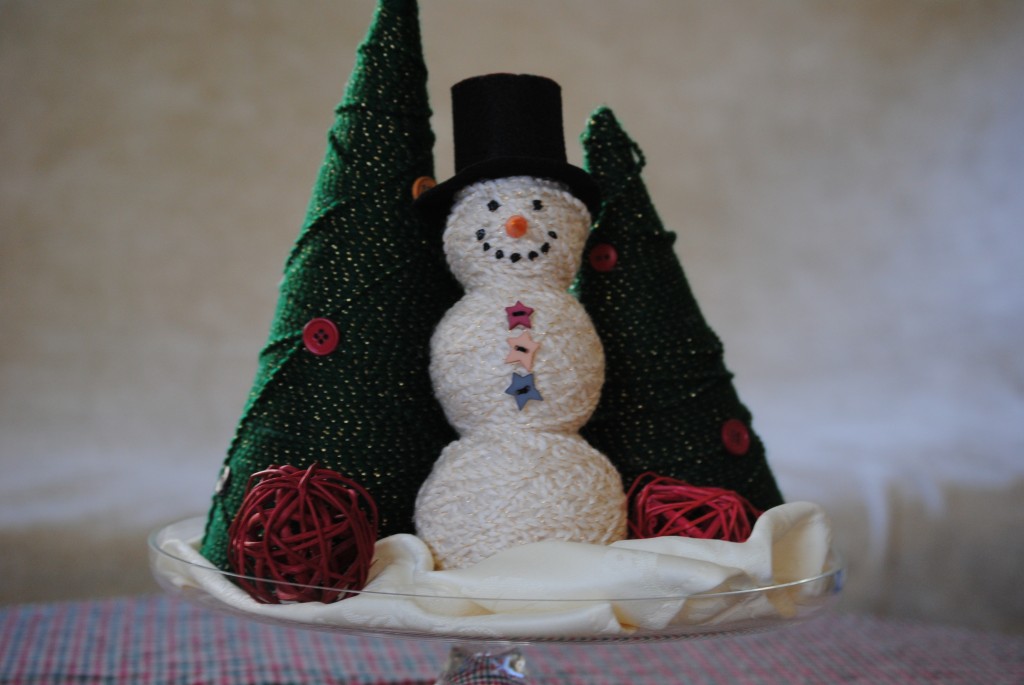
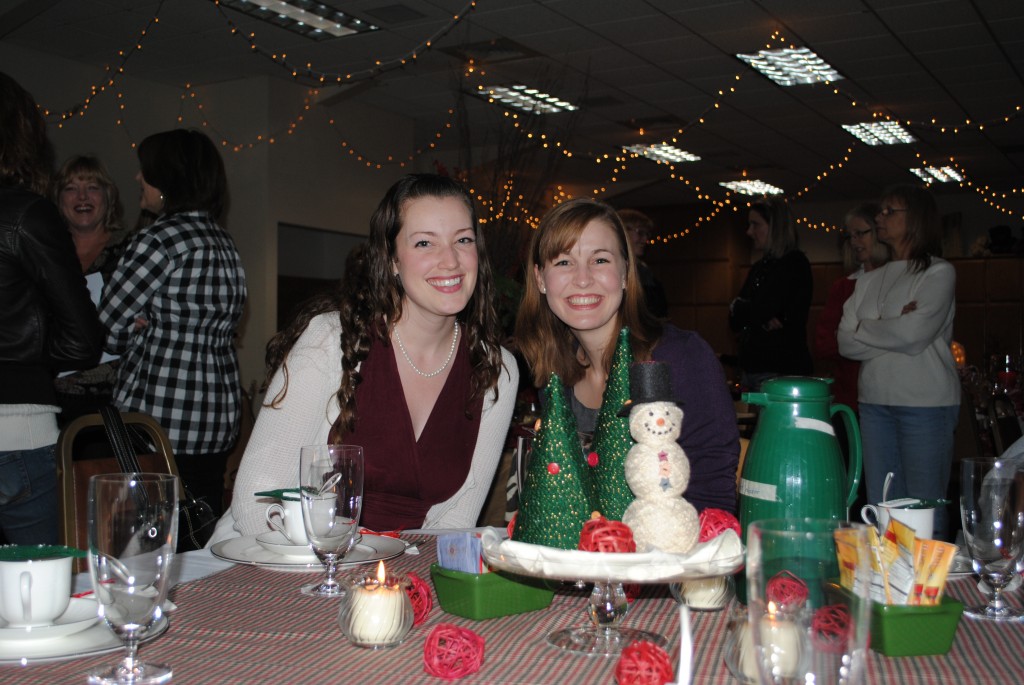
We made a yarn ball snowman from my tutorial, and trees that were inspired by these trees on Pinterest
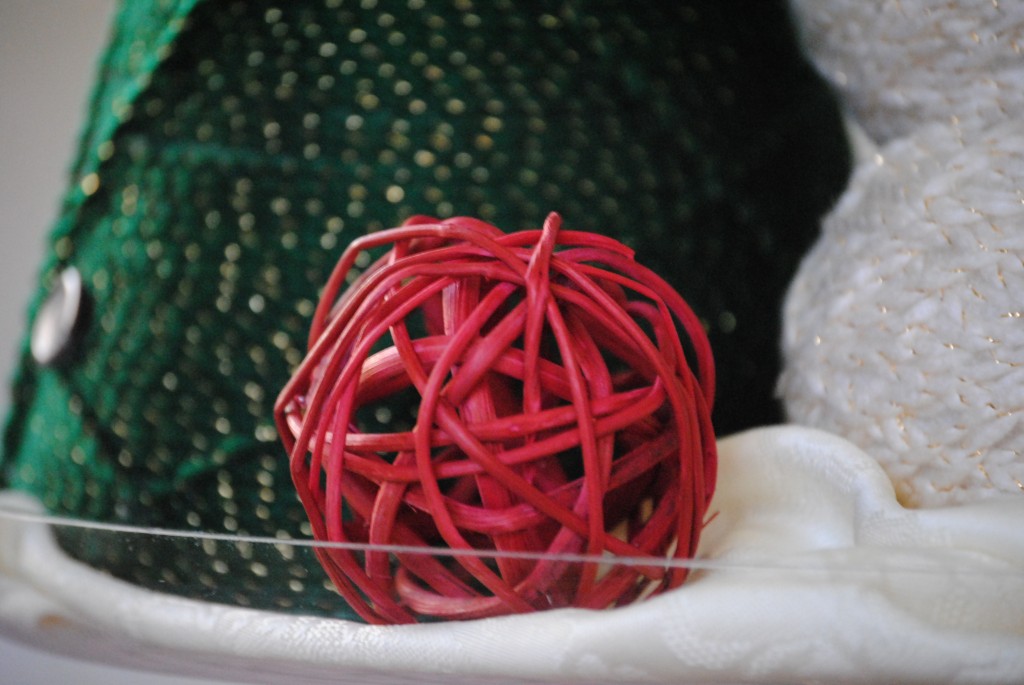
I pulled these cinnamon-scented wicker balls out of my glass hurricane candles (bought the balls at Target 3 years ago and use them in my candle holders every Christmas--they didn't mind being borrowed for the event!)
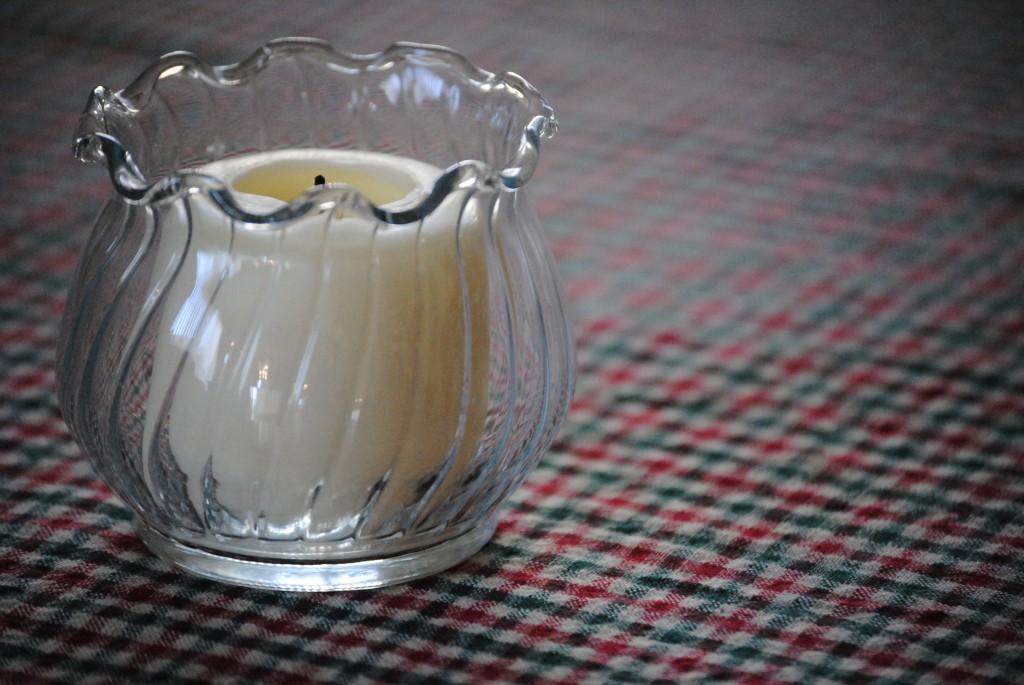
We spread Kayleigh's future Christmas dress over the table as a makeshift table cloth, placed the centerpiece on my glass cakestand, and set three glass votives around the bottom of it.
How did we pull this off without spending anything? We worked with the things we already had in our craft rooms at home.
We used:
♥Stacey's felt and sequins for the tree ornaments and the snoman's hat
♥My yarn and buttons
♥We made cones for the trees out of cereal boxes instead of spending about $7 on styrofoam cones
♥ The candles and votives came out of our closets
♥The Christmas plaid will be turned into a Kayleigh's first Christmas dress :)
Pinterest is a great way to see ideas that other people came up with using what they had. We didn't make anything exactly like someone else did, we just used our own style and our own items. Have fun with Pinterest, and see how it can save you money, too!
Subscribe to:
Posts (Atom)


